Showing posts with label American Crafts. Show all posts

Monday 14 April 2014

Using Stickers For Starting Points!

Hello, it's Louise here today. Welcome to SJ Crafts.

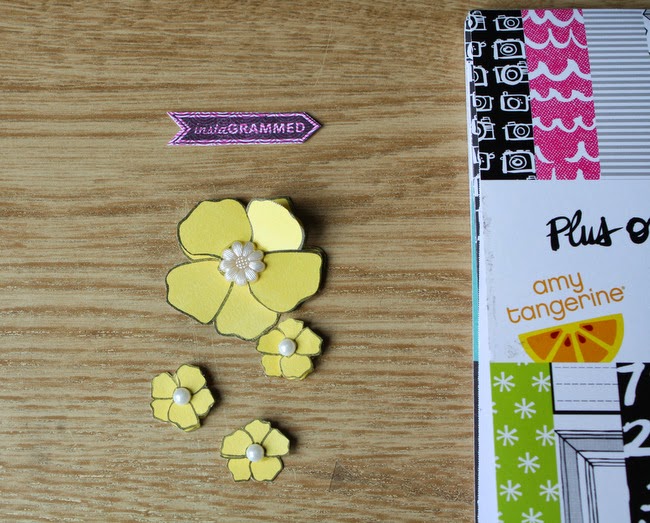
Last month I used Amy Tangerines Plus One collection to create these layouts. Today I'm here to share with you another two layouts and some greeting cards using the same collection. This time my focus is on the Amy Tangerine's sticker sheet.


How many of us are guilty of buying collection kits that include a 12x12 sticker sheet? You know the sheets I mean, the ones that usually include an alpha set and word stickers.

I am definitely guilty of this, even when I purchase a few sheets of 12x12 paper or a small 6x6 paper pad I check to see if there is a sticker sheet to accompany them! 

It's safe to say that I have quite a selection of these 12x12 sticker sheets and most of them look very similar to this one.....


.....half used with stickers cut out, where I have placed them onto a project to see what they look like without sticking them down straight away.

Instead of putting this half used sticker sheet away with all the others I challenged myself to create a couple more layouts using a sticker as a starting point. Well, Amy Tangerine has designed a fun collection, it would be a shame not use all those stickers, wouldn't it?!

On the right hand side of the used sticker sheet I shared with you above, you will see where a long pink sticker sat. When I decided to use a sticker as a starting point I adhered this sticker to a sheet of 12x12 cardstock before I thought to take a photograph. From the whole sheet this is the one sticker that jumped out a me shouting "use me, use me", so after placing it on the cardstock I put it to one side knowing I would need to locate the photo I wanted to use.


In the meantime I selected a few more stickers that I knew would work with the second photo I'd chosen to scrap. I mixed the 12x12 sticker sheet with some of Amy Tangerine's puffy stickers. The large sticker "an everyday kind of adventure" was the sticker I'd chosen to base my layout around:


I started out with a sheet of white cardstock (it seems to be my "go to" supply at the moment), my photo and my adventure sticker. Placing the stickers and some Amy Tangerine cards from the 6x6 pad I started to build up my page:


This photo of me was taken on top of an open air bus on a tour of Liverpool city. There I was, in my element, taking lots of photos and in true British Style, the heavens opened. We had to move downstairs and as it continued to pour with rain, more people squeezed onto the bus, the windows steamed up and bang went my sightseeing photo taking tour :). This fun sticker collection included an Umbrella too. Just perfect.

Not only did I use a sticker to base my layout around, I used the alpha stickers and Amy Tangerine's Cards from the 6x6 paper pad to create my title....

My happy place is behind this camera.
 
Sunday Morning Routine

Remember the big long pink sticker from above....by now I'd located the photo that I'd had in mind to scrap with this sticker. A rugby photo no less. One where the funky socks would work well with the funky stickers, and one where this sticker would record our Sunday Morning Routine.

Really, this sticker I could have used again and again. It's a perfect sticker to use to record so many everyday things.

The sticker was used to create the title for my layout.


More Amy Tangerine stickers from the above sheet were used along with an Amy Tangerine badge and bradstudio calico stars and Mister Huey Mists.

As I went to photograph my layouts I moved my corner rounder across my desk and done something I haven't done in a long while. I corner rounded my layouts. I'd forgotten how much I like the look.

Cards

After completing the layouts I took another look at what was left on my sticker sheet and decided to make some cards using papers from Amy Tangerine's 6x6 paper pad and some of the remaining stickers.


First up is the Typewriter sticker. I trimmed down a sheet of 6x6 patterned paper from Amy Tangerine's pad and inserted side panels. The patterned paper is rather busy so the plain grey side panels tone it down a little. 


To add some texture I ran the paper through my sewing machine. It is a good idea to sew your paper before you stick it to your card. That way the stitching will not show on the inside of your card.


Adding a little stamped text, a badge and the typewriter sticker, there is a little card on it's way to a lovely recipient.

The world globe was the next sticker left on the sheet that I wanted to use. I took three patterned papers from the paper pad to layer and stitch.
The small grey hello sticker and alphas together made a greeting.  I added the globe, a few stars and twine and I have a card that I love.


Did you spot the teeny cloud on the above sticker sheet? Half way up on the right hand side under the orange umbrella! I wanted to use it and noticed that Amy Tangerines puffy stickers also had a teeny puffy cloud. Picking out three patterned papers again, I went for the house paper and layered and stitched along the top of the layered papers to add design and texture. With a few gems and the puffy house sticker I finished my card.


It feels good to have used up most of my sticker sheet. Amy Tangerine's stickers are inspiring and fun to use. I enjoyed using them so much that I'm now going to pop across to SJ Crafts shop to see what collection and sticker sheet I will purchase next.

So...   
  •  are any of you are going to admit to having lots of these half used sticker sheets? 
  • how many of you are now thinking you could use these stickers on your next project?
  • are you thinking about including a sticker sheet next time you shop for supplies? 

Please do leave us a comment and let us know.
Thank you for stopping by, have a lovely day! 

Louise x

To see more of Louise's inspiring craft projects check out her blog Boys, Bugs and Beautiful Buttons!

Friday 21 March 2014

One Step Further ... Stitching and Stamping!

Hello all, it's Louise here today! 

I want to show you something that's bright, that's fun, that's funky. It's Amy Tangerine's Plus One Collection!

A wonderful collection that I have really enjoyed using. Today I'd like to share with you how I've used Amy Tangerines Plus One Collection to build two layouts, adding stamping and hand stitching for texture, dimension and interest...


I had a handful of photos at the ready and eventually decided to go with three smaller photos. I roughly placed them on white card stock:


I flipped through Amy Tangerine's 6x6 paper pad umpteen times. All the papers are wonderful and any would have worked with a grid format I'd decided upon. Eventually I cut into two of the patterned papers and cut out a small word card and picture card. These were placed on the layout with the stitched feather tag.

Have you seen Amy Tangerines Plus One die cut tags? Some of them have holes in them for you to add stitching. A very clever idea, it means you can adapt them to suit your colour scheme, adding a dash of colour and texture at the same time!


Slowly (as I am a very slow scrapper) I added some more patterned paper pieces, wanting to fill in all the gaps I used Amy Tangerine's remark accents and sticker sheet and puffy stickers (my new addiction) and a fabric brad.

At this point I am only placing papers and stickers onto my page. Nothing will be stuck down until I am happy that everything is in the right place...

 You can see how the layout is coming together. I left a hole in the middle and decided to add a hand stitched heart using a template I have had in a draw for far too many years:


At this point I took a photo with my mobile phone. Mainly so that when I stuck all the pieces down I had something to refer back to....if needed (who am I kidding...I know I'll forget where everything goes), especially knowing that I'd be removing all the elements to add some Mr Huey Mist.


Before adding the mist..I went one step further and took out two roller stamps (like this one), adding rows of stars and hearts in places that I thought needed some added interest. I love how adding a stamp to a layout can give it a new look:


Clearing the page I used a mist  to add a few splashes to the stamped areas.

This is how my layout looks now. Everything is stuck down and a date stamp has been added. The feather has been stitched using pink cotton to blend with the other pink elements:


Hmmm....I wasn't happy though, my layout didn't feel finished.
I wonder how many of you have had that feeling from time to time?! 

Now, when I use stamps on a layout I tend to use them on the background paper/cardstock, as I have done this time. There are times when I use stamps to make my own embellishments and this is what I decided to do to finish off my layout.

Using a flower stamp I stamped directly onto a Amy Tangerine's paper and cut the flowers out. The paper has as Ombre effect and this stood out on the finished flower.  I hope from these photos you can see how this flower came together. Three Dimensional tape was used between each layer of the flower.


Still....my layout lacked something and that's when I decided to add some more little flowers, making them in the same way as the big one. All they needed was a pearl gem in the middle to finish them off.


I used a triangle stamp in the same way to make some tiny tiny bunting. 

Finally I was happy, taking this layout one step further with stamps and stitching has definitely made this layout for me. Would you agree?


 Here are some close up's so you can see some more of the details.
 

 Inspired yet to dust off your stamps and stitching templates?


If you are still unsure please carry on further and check out my second layout. Still using the fabulous Amy Tangerine Plus One collection. This layout will sit with the one I've just created as the photos were from the same evening and tell an Instagram selfie story.

I started in the same way. I picked some 6x6 Amy Tangerine papers and decided on a title using a tag from Amy Tangerines Die cut tags. To tie this page to the previous one I stitched another heart and freehand stitched the word "forever" this was after I used a roll stamp, to add some stamped hearts, stars and arrows.


I printed out the word and used a poky tool to make evenly spaced holes.
 
 Some more patterned papers pieces were added to the page.


I loved the flowers so much from the last layout that I made them again along with an Instagrammed stamp to create the arrow. 


The flowers and Amy Tangerines sticker sheet and puffy stickers were placed on the layout.

My layout is busy, fun, funky and bright. I liked it..so I got ready to stick everything down.


 The fabric black X brad looked wonderful on the top right corner. The orange bottom button didn't feel right. So after making a few minor changes, adding a black camera badge instead of the orange one, adding another printed word and to finish off with some of Studio Calico Stars.... I was happy that my busy layout was finished.


Here are some close up photos so you can see more of the details.


It's your turn now...
  • How do you feel about stamping on your projects?  I use stamps time and time again on my projects. When you cannot find the right embellishment of paper try pulling out your stamps. I bet you have something that will fit the occasion.
  • How do you feel about stitching on your projects? Maybe you have a stitching template hiding away somewhere ...pull it out and use it. You'll be surprised how much you like it!
  • Finally Amy Tangerine's Plus One Collection. What do you think? Is it bright, fun and funky enough for you. Please leave us a comment and link if you have/will purchase this collection and create with it.
Thank you for stopping by, I hope you have enjoyed this post as much as I enjoyed creating it. Louise x x x

Louise is a busy Mum of three boys and she blogs her wonderful crafts at Boys, Bugs, and Beautiful Buttons!

Monday 25 March 2013

Dear Lizzy Lucky Charm Cards

Hello and a very Happy Monday to you!
 
It's jennifer back today to show you the cards I made with the Dear Lizzy Lucky Charm Paper pad and stamp set!
 
If you missed the layouts you can see those right here!
 
The papers have such cute designs for making cards with. I have two to show you ..... one is more dreamy, and one a bolder style.

 
The balloon stamp just goes so well with the cute cloud paper.
 
I scattered a few enamel dots, gems and some White Liquid Pearls.


For my second card I used the lovely spotty paper for a background to the little envelopes and added some Gold Liquid Pearls.
 
I can't wait to send these to someone and make their day!

Lucky Charm is currently in stock here!! I promise you'll find all kinds of uses for it!
 
Jennifer x
 
See more of Jennifer's crafting on her blog at: Jennifer's Jumbles

Tuesday 19 March 2013

Dear Lizzy Lucky Charm

Hello All!

It's Jennifer here today, to show you some projects using the Dear Lizzy Lucky Charm 6x6 Pad and Stamp Set, which are both oh-so pretty and versatile!

Love on Paper Layout


I have to say I am surprised by how much I LOVE this collection! When I saw it online I thought it was nice, but when I received it and flicked through the 6x6 pad I was blown away by the sweet designs, and how well they were balanced out with some graphic and plainer papers. It's all very, very useable!

My only problem has been that you only get one sheet of each paper - 36 single-sided different designs of paper, and they are all gorgeous! How do I choose which one to use? How do I bring myself to cut into one when there isn't a 'spare' sheet of the same design? The papers were calling me to use them, so I just braved it and snipped in! Lol!

I die-cut a few feathers from the papers to give them a place to shine. They made me think of writing quills which fit with the 'signing the register' theme. The navy paper with 'love you to the stars and back' written all over it has to be one of my most favourite papers ever!


The feathers, the punched hearts, and the hot air ballon (which is stamped onto white card) were stuck onto the layout using 3D foam dots. They stand out nicely from the background of grey cardstock, which had white mist splattered on it, and the small heart from the Lucky Charm set heat embossed with gold several times to add some shimmer!

One of the things I like so much about the pad is all the sheets which are good for cutting apart - a couple of journal cards, elements, or borders papers, and then one sheet filled with little envelopes and one with jars which can be cut out to make little embellishments.


You can see several of these down in my journaling corner of the layout.


The enamel dots are My Mind's Eye My Girl, and the gems are Hero Arts Clear Gemstones (I'm on my third pack of these now!) - these are both on the next couple of projects too...

Next I made a more graphic layout using some chevron, stripes, and triangle patterns from the pad...

Disney Family Layout


I love the cloud stamp in the set, which you can see at the top right, because the clouds have a straight line at the bottom - I like this a lot more than clouds that are fluffy all around, I don't know why! The arrows stamp used a few times on the left of this layout is so fun too, and will be good for all kinds of projects.

The 'this is so awesome' and 'you make my heart sing' cards on here are also from the cut apart sheets in the 6x6 pad (though I added the heart).


With all these cute designs to work with I decided to make a couple of cards as well!!
 
I'll show you those in my next post!

Thanks for stopping by - please do leave a comment and say "Hi!"
 
Jennifer x
 
See more of Jennifer's crafting at her blog: Jennifer's Jumbles

Wednesday 13 June 2012

New Echo Park Collection!

It's been a busy morning here with deliveries!

I've just uploaded the gorgeous new collection from Echo Park!

So Happy Together is bright and fresh, with a colour palette of blues, pinks, orange, greens and yellow. 
With cute images of home, travel, sweet little birds and patterns of chevrons, hexagons, flowers, dots and stripes it's perfect for almost any layout.

Here's the papers, stickers and alphas:


And the other side of those beautiful papers:


You can see and buy the whole collection here!!

Also, we are now stocking the American Crafts Adhesive Runners in solid and Strip!!

American Crafts ~ This To That ~ Adhesive Runner with Refill (SOLID) *New*  American Crafts ~ This To That ~ Adhesive Runner with Refill (STRIP) *New*
Finally, don't forget to check out the bargains in our June Sale!!

Enjoy your day!!

Sarah x


Tuesday 29 May 2012

New Stock Update!!

Lots of lovely new goodies have been arriving recently so I thought I'd give you all a quick update!!

NEW from American Crafts the beautiful Dear Lizzy Neapolitan Collection can be found here!

We have the very popular jar and camera stamp and the roller date stamp arrived and promptly sold out, but more are coming soon!  

                American Crafts ~ Dear Lizzy Neapolitan ~ Jar Clear Stamp *New*   American Crafts ~ Dear Lizzy Neapolitan ~ Camera Clear Stamp *New*    American Crafts ~ Dear Lizzy Neapolitan ~ Roller Date Stamp *New*

Do take a look at the co ordinating new Thickers Alphabets and the 6 x 6 pad too! 


American Crafts ~ Dear Lizzy Neapolitan ~ 6" x 6" Paper Pad *New*American Crafts ~ Dear Lizzy Neapolitan ~ Puffy/Glitter Thickers Alphabet  ~ Charmed Peapod *New*


NEW from ECHO PARK is not one but two new collections:

Paradise Beach and Sweet Days

Paradise Beach Collection *New*  Sweet Day Collection *New*

Both collections are gorgeous and full of bright, fresh colours! The kits are in stock here!!

Just arrived this week .....


SMASH Collection *New*  K & Company ~ SMASH Tape ~ Black Dots *New*

Keep an eye on the website for the Smash Folio Journals coming soon!! 
Along with more Smash Accessories!

SMASH ~ Folio Journals SMASH ~ Folio Journals
I'm lovin' the pink one ..... or maybe the orange!!

 I love the way that Smash will work on scrapbook layouts as well as in the Smash folios the range was originally designed for. The tapes, journal pads and so many of the accessories can be used on 12 x 12 layouts too!

Some gorgeous Petaloo flowers are now in stock, different colours available!

Petaloo ~ Forget Me Nots Flowers ~ Brown (1835303) *New*    Petaloo ~ Delphinium Flowers ~ Pastels (1300701) *New*

Ranger have released a limited edition Spring distress ink pad set.
3 distress ink pads in brand new colours! 
These are flying off the shelves so if you want one grab it quick!!

Distress Ink Pad Seasonal Set ~ Spring

Last but not least, there is Teresa Collins Sweet Afternoon, Echo Park's Hello Summer, My Minds Eye Nostalgia and On The Sunny Side and Prima Fairy Belle

We have the 6" x 6" pads for all these, which are perfect for card making!

Teresa Collins ~ Sweet Afternoon ~ 6" x 6" Paper Pad *New*  Echo Park ~ Hello Summer ~ 6" x 6" Paper Pad *New*  MME ~ Nostalgia ~ 6" x 6" Paper Pad *New*  MME ~ On The Sunny Side ~ 6" x 6" Paper Pad *New*  Prima ~ Fairy Belle ~ 6" x 6" Paper Stack (950187) *New*

Why not grab a cuppa (or ice cold drink!!) and browse all the new goodies here!