Saturday 28 July 2012

My Minds Eye Nostalgia Cards

Hi All ... I hope you have been enjoying the recent good weather!

Today I'd like to show you a couple of cards the very talented Jenny has made using papers from the gorgeous MME Nostalgia 6 x 6 pad which are in stock in the shop.

MME ~ Nostalgia ~ 6" x 6" Paper Pad

These papers really are so versatile ....  at first they may appear to be quite feminine colours with the pinks and yellows but Jenny made two cards suitable for males to show you just how adaptable they are.

Jenny used Glossy Accents on the balloon and liquid pearls on the bow tie and collar. 


The 6" x 6" Nostalgia pad is available here!

Also, don't forget to check out the Bronze, silver and gold Special Offers!!

Thursday 26 July 2012

Challenge 6 (Red, White & Blue) Winner & Top 3

Hi Everyone!
It's Jenny here with the winners for Challenge 6 ( Red, White & Blue)

Our winner of £5 voucher to spend in the SJ Crafts Shop!, selected at random is ....

No 29!!


That's Kelly Smith !!!  Well Done! 

Please e mail sarah at sj papercrafts (dot) co (dot) uk  with your address details and she will organise your voucher!       

The TOP 3!!

The Design Team enjoyed visiting your blogs and have helped me select the following 3 projects as our favourites!!

No.1 Mel J - with her fantastic scrapbook page


N0.24 Rina Fashionista  - with her sparkly card

No.48 Scrapellen - with her fantastic boy's card


Congratulations to all the Top 3 entries!! 

If you would like to display our "Top 3" badge on your blog please e mail sarah at s j papercrafts (dot) co (dot) uk and we will get it sent to you!!


Our current challenge is still open here! You've still got plenty of time to enter!

Have a great day!

Saturday 21 July 2012

Monthly Challenge No 7 (August)

Sorry, I'm a few days late posting our new challenge .... I have family staying with me this week and it's been just a little bit crazy here!

Challenge No 7

Our theme this month is ...

The Olympics!!

Did you see the olympic torch relay? - you could scrap the photos you took!
Have your children had a school sports day? - Show us your sporty photos ... football, rugby, tennis, skipping or playing catch on the beach or in the garden!!
The Olympics will be held in London so any photos of London will be suitable.
You could use the colours or rings of the logo as a design element!
Dig out your sporty rubber stamps for your cards!
Just a few ideas....!

Closing date for entries is: 15th August at 1pm.

One random winner will win 6 x 6 Pad (of the winners choice from the shop!)

Please remember to check out the monthly challenge rules on the tab at the top of this blog, before entering. A quick reminder of our main rules:

Please link directly to your post & not a general link to your blog. 
You must mention and include a link back to the challenge in your entry post. No back linking please - new work only.
The winner must contact me by e mail to receive their prize. A few of our favourites will also be selected to be featured on this blog!
The final (& most important rule) is to have fun!!

The S J Crafts Design Team have come up with some great inspiration this month!


Please do click on their name to visit their blog and leave them a comment ... I know they'd love you to visit them!


"Perseverance" Layout


Lisa-Jane went with the idea of the Olympic rings and one of the qualities needed to be an Olympic athlete.  She used circle dies to make the rings, October Afternoon's Rocket Age for the papers, Jenni Bowlin pennant stickers and stickers from stash!


"It doesn't end here" Layout

Louise used up some leftovers from Echo Park This and That Charming and Note to Self range and Jenni Bowlin hexagon stickers. 


Altered Notebook & Pen


Jenny's adorable project includes Gold Stickles & she used a Fiskers punch to create the scalloped borders.


'Chasing Waves' Layout


Jennifer's fab background is Kraft Cardstock misted with Pink Mister Huey!!

We can't wait to see your sporty & Olympics projects!!

Please remember to link directly to your blog post and to include a link back to the challenge.

If you do not have a blog, please e mail your entry to me at sarah@sjpapercrafts.co.ukand I'll upload it for you.

Good Luck and have fun!!

Thursday 12 July 2012

Scrapping with SMASH!!

Hi Everyone ... Louise here today!
Have you seen all the new Smash items?
Aren't they lovely?!

It would be a great shame though to save all these gorgeous pads and tapes just for our smash books....wouldn't it?

Today I'd like to share a layout created using a few of the Smash items Sarah has in the shop:

The SMASH items I used:
journaling notes from the favourite person pad.
Tiny flag clips
Section smash tape

K & Company ~ SMASH Pad ~ 2 Of Us/Favourite Person*New*     K & Company ~ SMASH ~ Tiny Flag Clips *New*     K & Company ~ SMASH Tape ~ Section *New*


... and I added into the mix lots and lots of patterned paper scraps. 
In fact my pile looked like this....


I started by pulling out some recent scraps and an old sticker sheet, together with the smash items Sarah sent me.  White bazzill was chosen for the background.

I wrote my journalling on a few pages from the 2 of Us smash pad and added the flag clips to the tops of them. I then built up an area with my paper scraps to sit below the journaling. Sections of the smash tape added here and there gave a further splash of colour.


I added a simple title but then this created an empty white space on the right hand side. Grabbing the old sticker sheet the beautiful yellow bicycle jumped out at me.

Perfect for filling the space!


  A few more stickers were added until I was happy that the space was covered.

The journaling notes were added over the top of the scraps and with a little embellishment added to the top of the layout......


........it was finished.......


 Have you got a handful of scraps and some old stickers that you'd like to put to good use?
Or even a hoard of Smash items that haven't yet made it into your Smash book. 
You have??
Great ... Go Grab them and create a layout with them!!
Just remember to overlay and fill the space until your happy with how it looks.
And be sure to link up in the comments so we can pop across to see. 

Thank you for stopping by today!
Louise

Saturday 7 July 2012

Challenge 5 (All About The Boy) Winner & Top 3

Hi Everyone!
It's Jenny here with the winners for Challenge 5  All About The Boy
Sorry we are late again this month - time just seems to be flying by at the moment.

Our winner of the selection of mini ink pads, selected using random.org is.....

No 28!!

That's Tine!!!  Well Done! 


Please e mail sarah at sj papercrafts (dot) co (dot) uk and with your address details to send you your prize!       

The TOP 3!!

The Design Team enjoyed visiting your blogs and have helped me select the following 3 projects as our Favourites!!


Sharon J- with her banner card!


Donmark - with her campervan card!


Torry - with her fun kraft card!


Congratulations to all the Top 3 entries!! 

If you would like to display our "Top 3" badge on your blog please e mail me sarah at s j papercrafts (dot) co (dot) uk and I'll get it sent to you!!


Our current challenge (Challenge 6) is still open here! You've still got plenty of time to enter!

Have a great day!


Tuesday 3 July 2012

UK Scrappers Blog Hop!

Hello and welcome! 
Today we are excited to be participating in the UK Scrappers Blog Hop. If you are following the hop you should have arrived here from Sir Stampalot!!  To be in with a chance of winning the UKS Blog Hop prizes you will need to comment on this post (and on all the blogs in the hop) and remember to mention your UKS user name in your comment. Finally be sure to reply in the UKS thread on the forum when you have completed the hop.

After your visit here hop on to That's Crafty and if you lose your way or you want to start at the beginning of the hop you can find the complete list here!

We are also offering 20% off all orders placed via our online shop with the code UKSBLOGHOP entered during checkout.  The code is valid right up until 11pm on Thursday 5th July.

Our project for you today is a fairly quick layout - it took me just over an hour (excluding drying time!) to complete! We'd love you to have a go too!!

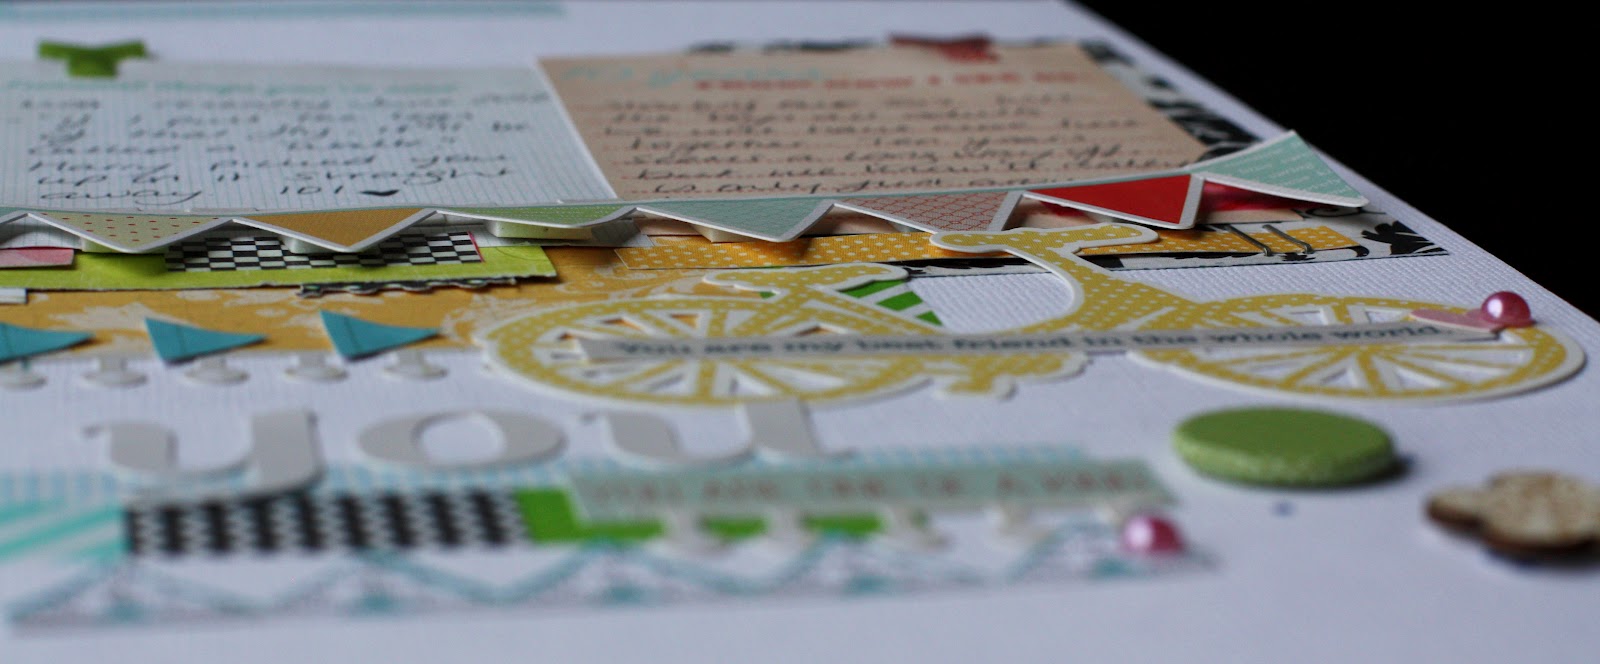
"Summer Days" Layout


This is the kit of supplies that I gathered together:
2 x patterned papers - Try to pick one bold and and one more subtle pattern. My patterned papers are from Echo Park So Happy Together
1 x bazzill cardstock (12 x 12) (for your background) and 1 scrap of cardstock - (I didn't use the green on this layout in the end so just ignore that in the pic!)
A sheet of journalling cards (mine is "jot it down" by Echo Park)
Selection of Stickers - I picked out the alphas and stickers from Echo Park's Hello Summer and So Happy Together. I love how these two collections work so well together.
Stamp Set - My stamps are from My Minds Eye, Miss Caroline. You will need a stamp for the background and this set also has a "date" and "place" stamp but you can leave these out if you don't have them.
Paint Dabber - I used Jenni Bowlin in speckled egg
Pink Gems - Mine are by Hero Arts
Washi Tape
Photograph- 1 x 6" x 4" Portrait


So, onto making the layout:
Choose your back ground cardstock (I used a sheet of kraft bazzill) and cut 2 panels from the patterned paper and scrap cardstock (or you could use another pattern instead of cardstock if you prefer). The sizes were approx 13cm x 17cm and 12cm x 16.5cm but if you are using a different size photo just adjust the sizes appropriately. 
Choose and cut out a journalling card from the 12 x 12 sheet.


Mat your photograph onto a piece of patterned paper (a more subtle pattern works better) and adhere to the other 2 panels. Don't put adhesive on the edges of the paper so you can slightly lift the corners to give some texture and also if you want to tuck anything under later.  

Position on your background cardstock (but don't stick it down just yet) and lightly mark with a pencil where your photo mat will be and then put it safely to one side whilst you apply the paint in the next step!


Stamp your background stamp using the paint dabber to apply paint to the stamp (instead of ink) and then take the lid off the bottle and dip a paintbrush into the paint and gently flick onto the cardstock. You might want to practice this on scrap card if you've not created paint splatters like this before!
Use you pencil marks to help you get the paint where you want it to show!


Once the paint is dry adhere your photo mat to the background and add a title. I used the "Summer" sticker and the small blue alphas so I could raise it with foam pads.
Choose a border sticker and tuck this under the bottom edge of the photo mat with a strip of washi tape to soften the edges a little. I tore the tape but you can cut it if you prefer a neater edge.


Apply paint to the date and place stamp and stamp onto journalling card. If you don't have stamps for this, handwrite them onto the card or you could journal onto the card instead.


Cut small strips of patterned paper and layer up on the top edge with a small piece of tape and add a punched butterfly (or a small embellishment). I used my Martha Stewart punch.
Add the journal card tucking it under the photo mat and tuck a small piece of border sticker and washi tape under the card.


Add few more stickers, raising some up on foam pads and scatter punched butterflies and gemstones to finish.


I hope you've enjoyed our step by step instructions and if you do make a layout using them do let us know if the comments so we can come and see!

So, if you're following the blog hop, your next stop is That's Crafty

That's for stopping by!