Monday 25 March 2013

Dear Lizzy Lucky Charm Cards

Hello and a very Happy Monday to you!
 
It's jennifer back today to show you the cards I made with the Dear Lizzy Lucky Charm Paper pad and stamp set!
 
If you missed the layouts you can see those right here!
 
The papers have such cute designs for making cards with. I have two to show you ..... one is more dreamy, and one a bolder style.

 
The balloon stamp just goes so well with the cute cloud paper.
 
I scattered a few enamel dots, gems and some White Liquid Pearls.


For my second card I used the lovely spotty paper for a background to the little envelopes and added some Gold Liquid Pearls.
 
I can't wait to send these to someone and make their day!

Lucky Charm is currently in stock here!! I promise you'll find all kinds of uses for it!
 
Jennifer x
 
See more of Jennifer's crafting on her blog at: Jennifer's Jumbles

Thursday 21 March 2013

Kit Release Day!

Hello!
As many of you will be aware, earlier this year we introduced our kits!
 
Our kits are released on a bi monthly basis and contain beautiful patterned papers, cardstock and embellishments.
Each kit has enough "scrummy" stash to make at least 2 layouts (probably a lot more!)

No more spending lots of time gathering together your stash to make a layout .... we have selected beautiful co ordinating producs for you ... all you have to do is CREATE beautiful layouts with it!!
Today we have released our March/April kits!
 
This month there are two kits to choose from or why not treat yourself to both!!
 

This is the "SWEET GIRL" kit containing papers from the Echo Park collection of the same name!
 
 
and this is the "ALL ABOUT A BOY" Kit - again papers are from the Echo Park collection of the same name!
 
 
Sample layouts made with the kits will be right here on the blog and also on our facebook page very soon!

Tuesday 19 March 2013

Dear Lizzy Lucky Charm

Hello All!

It's Jennifer here today, to show you some projects using the Dear Lizzy Lucky Charm 6x6 Pad and Stamp Set, which are both oh-so pretty and versatile!

Love on Paper Layout


I have to say I am surprised by how much I LOVE this collection! When I saw it online I thought it was nice, but when I received it and flicked through the 6x6 pad I was blown away by the sweet designs, and how well they were balanced out with some graphic and plainer papers. It's all very, very useable!

My only problem has been that you only get one sheet of each paper - 36 single-sided different designs of paper, and they are all gorgeous! How do I choose which one to use? How do I bring myself to cut into one when there isn't a 'spare' sheet of the same design? The papers were calling me to use them, so I just braved it and snipped in! Lol!

I die-cut a few feathers from the papers to give them a place to shine. They made me think of writing quills which fit with the 'signing the register' theme. The navy paper with 'love you to the stars and back' written all over it has to be one of my most favourite papers ever!


The feathers, the punched hearts, and the hot air ballon (which is stamped onto white card) were stuck onto the layout using 3D foam dots. They stand out nicely from the background of grey cardstock, which had white mist splattered on it, and the small heart from the Lucky Charm set heat embossed with gold several times to add some shimmer!

One of the things I like so much about the pad is all the sheets which are good for cutting apart - a couple of journal cards, elements, or borders papers, and then one sheet filled with little envelopes and one with jars which can be cut out to make little embellishments.


You can see several of these down in my journaling corner of the layout.


The enamel dots are My Mind's Eye My Girl, and the gems are Hero Arts Clear Gemstones (I'm on my third pack of these now!) - these are both on the next couple of projects too...

Next I made a more graphic layout using some chevron, stripes, and triangle patterns from the pad...

Disney Family Layout


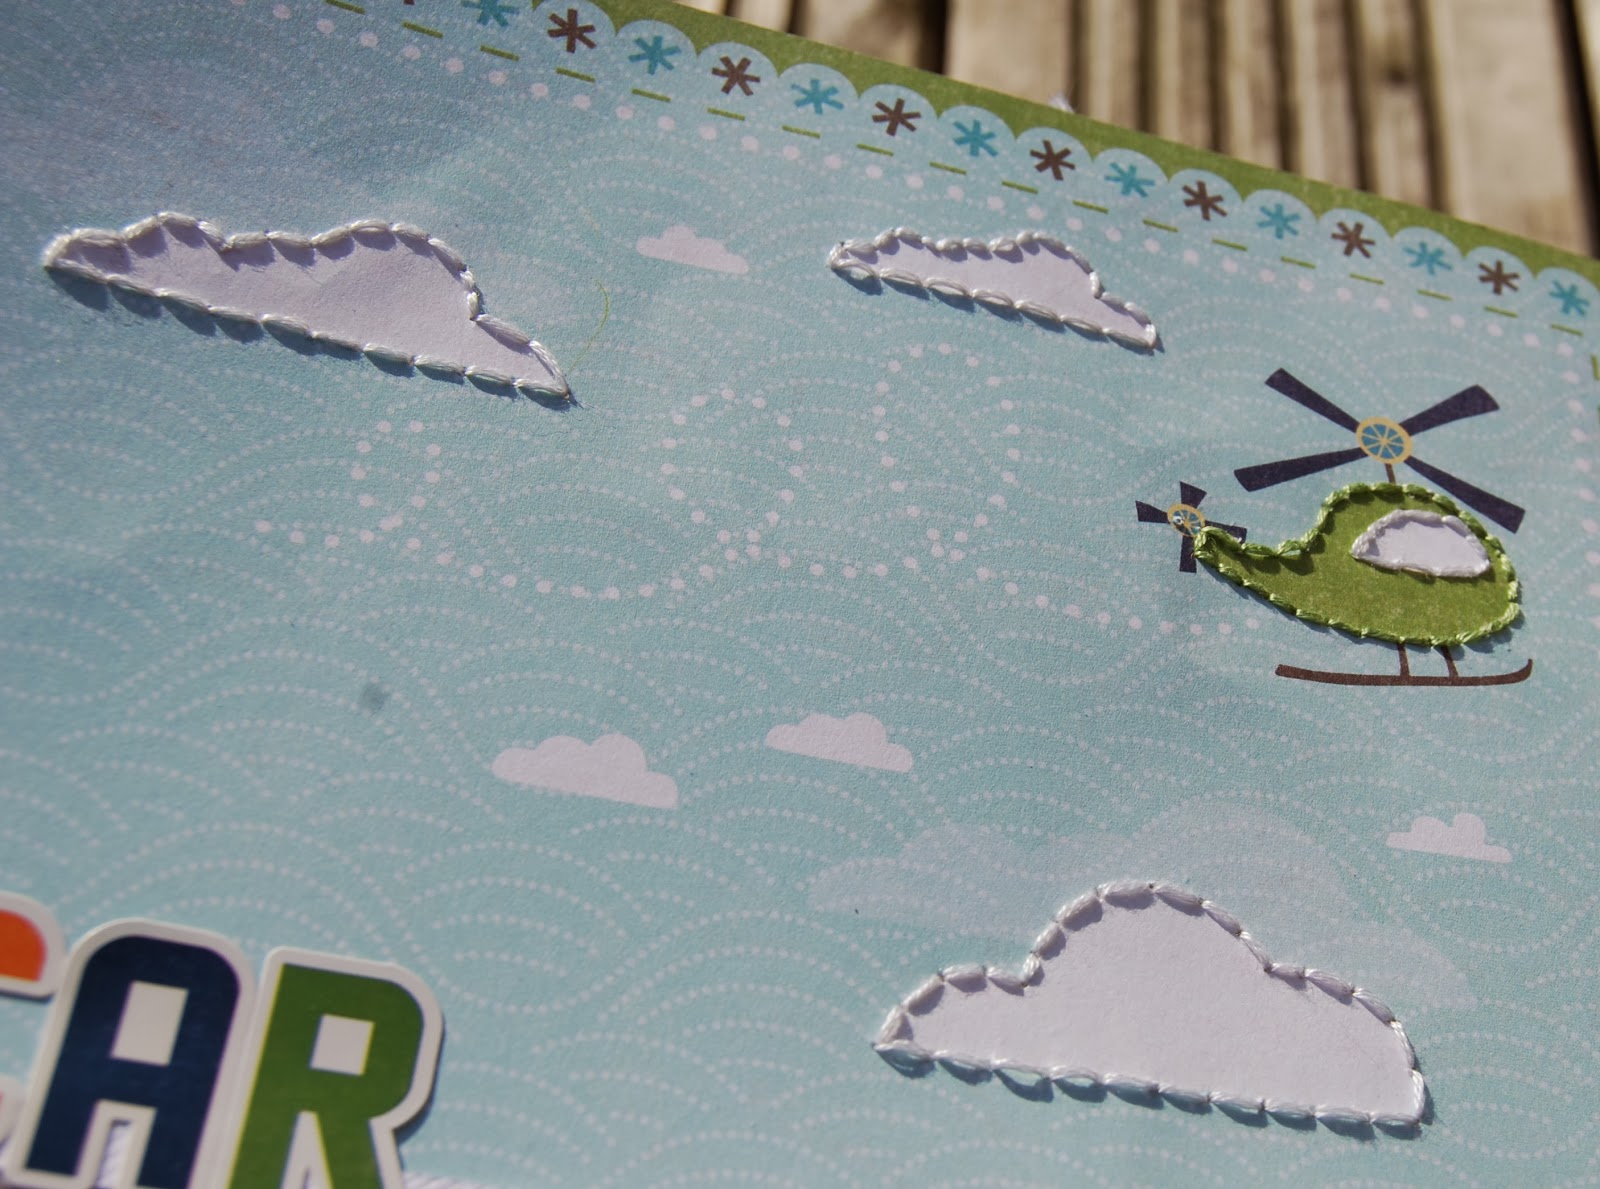
I love the cloud stamp in the set, which you can see at the top right, because the clouds have a straight line at the bottom - I like this a lot more than clouds that are fluffy all around, I don't know why! The arrows stamp used a few times on the left of this layout is so fun too, and will be good for all kinds of projects.

The 'this is so awesome' and 'you make my heart sing' cards on here are also from the cut apart sheets in the 6x6 pad (though I added the heart).


With all these cute designs to work with I decided to make a couple of cards as well!!
 
I'll show you those in my next post!

Thanks for stopping by - please do leave a comment and say "Hi!"
 
Jennifer x
 
See more of Jennifer's crafting at her blog: Jennifer's Jumbles

Saturday 16 March 2013

Studio Calico Snippets

Hello and a very happy weekend to you!

Louise here today to show you my projects made with the Studio Calico Snippets Collection!
 
My main supplies were:
 
Snippetts 6x6 patterned paper pad
Chipboard Arrows
Chipboard Cameras
 
All of which are available in the shop!
 
    This collection is perfect - it reminds me of bright summers days. Airy and light. The patterns are a mixture of bold and subtle, the colours being both bright and muted. What I like best about this 6x6 pad is that all the papers are single sided. You don't know what a weight off my mind it is not to have to choose between sides. The combination of colours and patterns is wonderful and suitable for all themes.

I'd like to share with you two 12 x12 layouts and several 4x6 horizontal mini cards/layouts. These layouts are for my holiday album which mixes 12x12 with 4x6 page protectors pockets.


The top two 4x6 cards will accompany a non beach/pool 12 x 12 layout in my album with the bottom two going next to to a 12 x 12 beach/pool layout.

First up is the beach/pool theme. I wanted a fresh bright feel to my holiday album and used the Bazzill white range of cardstock. The 12x12 layout is kept simple with lots of white space. The main focus being the photos.


The journaling is on the back of this page. I have so much to write for this holiday that occasionally there is too much to actually put on the layout. Here is my DH coming down the water slide with two of my boys in the pool waiting for him. He has a water camera in his hand, so while I take a photo of him (on the left), he is taking a photo of me (on the right). You might just be able to make me out in a black cosie standing with my feet firmly on the ground.

I fallen in love with the chipboard cameras and arrows. They are simply Cute!

The 4x6 cards and photos will go in the 4x6 page protector pockets next to the 12x12 layout in my album.


You can see I've used more of those gorgeous chipboard arrows with some titles and quotes.

For my second 12x12 layout I have chosen a non beach/pool theme. First of all I created a misted hexagon background.


To create this background I used an embossing folder. Spray your mist onto the raised side of your embossing folder, turn over and press onto your card/paper.

I used two mists here the Mister Huey Honor Society and Leaf Green

This amazing castle is the Harry Potter Ride in Florida. The title of this layout is taken from the words that my youngest son wrote about this ride at the end of the day.

More chipboard cameras and arrows.


As before, the 4x6 cards and photos will go into in the 4x6 divided page protector pockets next to the 12x12 layout.


Once again there is so much to journal for this page. Like.... how I came to have a photo of the "Public Convenience" sign and the story of the Harry Potter Ride, the Forbidden Journey. For this story in particular, the 4x6 card is a pocket which will hold all the details.


So.....I hope you like my Studio Calico projects. Making little 6 x 4 cards to go alongside 12 x 12 layouts is a great way to get all those extra details and photos into your album. I hope you might give it a go.  If you are still not sure I will be making plenty more 12x12 and 4x6 with this range so you may wish to keep an eye out over at my blog.


All these products can be purchased from SJ Crafts.

Thanks for stopping by today

Louise x

Don't forget to visit Louise's blog at : Boys, Bugs and Beautiful Buttons

Tuesday 12 March 2013

More Scoot Projects

Hi, I'm back again today to show you some more projects I've made with the Echo Park Scoot Collection. If you missed the last post you can catch up on that right here.
 
I did lots of stitching on the layouts I made on my Scrapbooking weekend away. On this page I stitched around the pictures printed on the  patterned paper that I had decided to use for my background.


I love the definition it gives to the images!
Almost brings them to life!


I added a length of ribbon, a few stickers including a border sticker and the only other piece of patterned paper that I used was the branding strip for the red banner!


I really got busy with my die-cutter for this double page about a Lego exhibition. I die cut my chevron background and continued the papers over both pages for unity even though the 2 pages are different.


Backing negative shapes with patterned papers is a great way to stretch your stash and use up smaller pieces and you can make a background using a craft knife, scissors or even a manual die cutter depending on the size and shape you want.


I used some of the cut out bits on the other page too. I love these colourful papers which would work equally well on lots of different theme layouts ... they're not just for boys!


Finally I want to show you a card I made using the papers and stickers to make a scene. I took my inspiration for this from Echo Park Designer Jen Gallacher who did something similar recently.


I used pop dots to add dimension on some of the stickers to raise them up!


Even after all of these fun projects, I still have papers and stickers left! I'm going to finish them off by making some more cards for some upcoming birthdays using the digger stickers and some scrunched up grey paper for stones and boulders. Its such a fun collection, it really brought a smile to my face and I hope it does yours too.
 
Lisa-Jane x
 
See more of Lisa-Janes Crafting on her blog: Inside My Head
 

Wednesday 6 March 2013

Echo Park SCOOT!!

Hi there, its Lisa-Jane here today with some layouts I have made using the wonderful Scoot collection kit from Echo Park.
 
I fell in love with this collection as soon as I saw that Sarah was stocking it in the shop and once I had it in my hands it was even better in real life than it had looked on-line.  I recently went away on a scrapbooking weekend retreat so I had a great chance to play around with the fabulous and colourful papers, stickers and cut apart sheets in the collection. The collection is designed with little boys in mind but I hope you can see from my layouts that I made that its actually more versatile than you might first think as many of the "b" sides are more generic and non-themed.

This first one was fairly quick and easy using both sides of 1 sheet of paper (the fire engines and the ruled lines). I cut the paper about a third in from the edge and then stuck both pieces to a piece of cardstock. Use a sheet of card that you don't like or is damaged!  It gives the layout some stability and makes sure everything stays true to 12x12!!

I was really lucky to catch my baby boy doing his first roll over at 4 months old. I had the camera out to take a picture of him in his little fireman's uniform when he just happened to roll over! I couldn't resist using the lovely fire engines paper!!


I used some pop dots to give height to some of the stickers and added a couple of buttons, a paper clip and some ribbon.


How about something on black for some contrast to those bright colours? 
 
This layout was made when I had completed most of the others so  I decided to use up some of the scrap paper panels to make a messy layered stack. I love how the vibrant colours really pop on the black background the same way the black does on the baby mat.


I used my Cameo to cut the title which refers to the mat being a present from an Aunt in New Zealand that we have never met. She made it all by hand and sent it over in time for his birth and left a space for us to record the birth details.


I journalled around the edge in white gel pen and added a few red cross stitches to give texture and to refer to the hand stitching in the story.


Even though quite a few of the papers are aimed at little people, there is a lot of variety in the pack, especially with the B sides. I used 2 of the more generic pieces for my layout featuring my little girl wearing aqua and orange which matched the orange paper nicely.


I die cut my title and the heart background from a template by Daniela Dobson and used the hearts as a mask on the kraft background with Mr Huey's white mist. I used a few bits and bobs from my stash and then outlined the title and the hearts with a white gel pen. I love the subtle effect of kraft on kraft and kraft on orange.


I'll be back soon to show you a few more Scoot projects!
 
Have a wonderful day!
 
Lisa-Jane x
 
Visit Lisa-Jane's blog: Come inside My Crazy Head!