Hello all, it's Louise here today!
A wonderful collection that I have really enjoyed using. Today I'd like to share with you how I've used Amy Tangerines Plus One Collection to build two layouts, adding stamping and hand stitching for texture, dimension and interest...
I had a handful of photos at the ready and eventually decided to go with three smaller photos. I roughly placed them on white card stock:
I flipped through Amy Tangerine's 6x6 paper pad umpteen times. All the papers are wonderful and any would have worked with a grid format I'd decided upon. Eventually I cut into two of the patterned papers and cut out a small word card and picture card. These were placed on the layout with the stitched feather tag.
Have you seen Amy Tangerines Plus One die cut tags? Some of them have holes in them for you to add stitching. A very clever idea, it means you can adapt them to suit your colour scheme, adding a dash of colour and texture at the same time!
At this point I am only placing papers and stickers onto my page. Nothing will be stuck down until I am happy that everything is in the right place...
You can see how the layout is coming together. I left a hole in the middle and decided to add a hand stitched heart using a template I have had in a draw for far too many years:

At this point I took a photo with my mobile phone. Mainly so that when I stuck all the pieces down I had something to refer back to....if needed (who am I kidding...I know I'll forget where everything goes), especially knowing that I'd be removing all the elements to add some Mr Huey Mist.
Before adding the mist..I went one step further and took out two roller stamps (like this one), adding rows of stars and hearts in places that I thought needed some added interest. I love how adding a stamp to a layout can give it a new look:
Clearing the page I used a mist to add a few splashes to the stamped areas.
This is how my layout looks now. Everything is stuck down and a date stamp has been added. The feather has been stitched using pink cotton to blend with the other pink elements:
Hmmm....I wasn't happy though, my layout didn't feel finished.
I wonder how many of you have had that feeling from time to time?!
Now, when I use stamps on a layout I tend to use them on the background paper/cardstock, as I have done this time. There are times when I use stamps to make my own embellishments and this is what I decided to do to finish off my layout.
Using a flower stamp I stamped directly onto a Amy Tangerine's paper and cut the flowers out. The paper has as Ombre effect and this stood out on the finished flower. I hope from these photos you can see how this flower came together. Three Dimensional tape was used between each layer of the flower.
Still....my layout lacked something and that's when I decided to add some more little flowers, making them in the same way as the big one. All they needed was a pearl gem in the middle to finish them off.
I used a triangle stamp in the same way to make some tiny tiny bunting.
Finally I was happy, taking this layout one step further with stamps and stitching has definitely made this layout for me. Would you agree?
Here are some close up's so you can see some more of the details.
Inspired yet to dust off your stamps and stitching templates?
If you are still unsure please carry on further and check out my second layout. Still using the fabulous Amy Tangerine Plus One collection. This layout will sit with the one I've just created as the photos were from the same evening and tell an Instagram selfie story.
I started in the same way. I picked some 6x6 Amy Tangerine papers and decided on a title using a tag from Amy Tangerines Die cut tags. To tie this page to the previous one I stitched another heart and freehand stitched the word "forever" this was after I used a roll stamp, to add some stamped hearts, stars and arrows.
I printed out the word and used a poky tool to make evenly spaced holes.
Some more patterned papers pieces were added to the page.
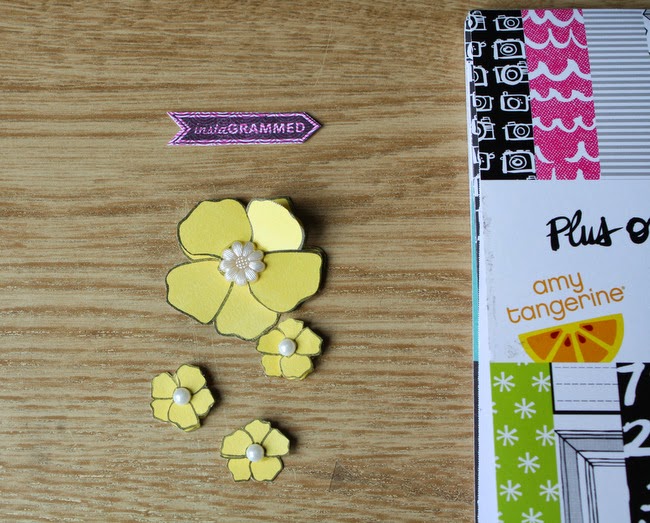
I loved the flowers so much from the last layout that I made them again along with an Instagrammed stamp to create the arrow.
The flowers and Amy Tangerines sticker sheet and puffy stickers were placed on the layout.
My layout is busy, fun, funky and bright. I liked it..so I got ready to stick everything down.
Here are some close up photos so you can see more of the details.
It's your turn now...
- How do you feel about stamping on your projects? I use stamps time and time again on my projects. When you cannot find the right embellishment of paper try pulling out your stamps. I bet you have something that will fit the occasion.
- How do you feel about stitching on your projects? Maybe you have a stitching template hiding away somewhere ...pull it out and use it. You'll be surprised how much you like it!
- Finally Amy Tangerine's Plus One Collection. What do you think? Is it bright, fun and funky enough for you. Please leave us a comment and link if you have/will purchase this collection and create with it.
Thank you for stopping by, I hope you have enjoyed this post as much as I enjoyed creating it. Louise x x x


.jpg)
.jpg)
.jpg)
.jpg)
.jpg)
.jpg)
.jpg)
.jpg)
.jpg)
.jpg)
.jpg)
.jpg)


