Showing posts with label Louise. Show all posts

Thursday 29 May 2014

Tags Bursting With Colour and Tim Holtz Techniques!

Hello and welcome back to SJ Crafts, it's Louise here today.


Yesterday design team member Annie shared her wonderful wonderful projects and techniques using Tim Holtz products. If you missed that post you can see it right here!

Today I'd like to share with you how I used mine!


I've always admired Tim Holtz's 12 days of Christmas tags and over the years I've purchased a few of his inks and stamps. I've always thought that his products were rather dark and masculine though.... until recently, when SJ Crafts stocked his new mini stackable ink pads.

I get through a lot of ink pads (especially black ones) and most of them don't last long at all. The Tim Holtz distress inks that I've had for years still ink as well as they did on the day I brought them. With this in mind I went for Kit 1 mainly for their vibrancy....and to accompany them the Faded Dot Stencil.

A few evenings after my new inks and stencil arrived I was perusing Pinterest when I came across some Tim Holtz layering videos....Annie shared some links yesterday. I watched with interest... even though I don't have all of the products he uses I took some things with me... for example, making sure each layer is dry before adding another and mixing the ink with a spray of water. I located my heat gun and water spray (note to self...do not leave water in your spray bottle for a long time..ewww!). 

Annie has already given you some detailed step by step techniques... so here's a quick run through mine. 

Blue Tag

1. I started out with some cream card stock, cut into a tag, the faded dot stencil, Peacock Feather Ink and black ink. Using washi tape to hold the stencil in place I took my Blending Tool, black ink and in spiral motions (as Tim demonstrated) rubbed through the stencil.


2. Remembering to dry the layer with my heat tool!

3. Next I dabbed the ink pad to my craft sheet and added a few squirts of nice clean water. Using my blend tool I mixed the two together and added the colour to the tag. Adding the water distresses the ink further giving it a lighter effect.

4. Again I dried the layer. Once the layer was dry I added some stamps using black ink. I did use the blue ink (without watering the ink down) with a scroll stamp and you'll see that the stamped scroll stands out even though its stamped in the same colour.

With each tag after this I tried out something different...


Pink Tag

I stamped and heat embossed a feather image, then added Picked Raspberry Ink through the faded dot stencil. The background Picked Raspberry ink was watered down and added to the card with the blending tool. A text stamp was used along the side of the tag again with the ink pad. A little ribbon, twine and embellie with some machine stitching finished it off nicely.


Orange Tag

This time I stamped the circle images first in Spiced Marmalade Ink, after drying the ink I sprayed a few squirts of water to the Spiced Marmalade Ink that I'd dabbed onto the craft sheet. When added this dries lighter allowing the darker inked image to show through. After the Faded Dot Stencil was placed over the top, used with black ink.
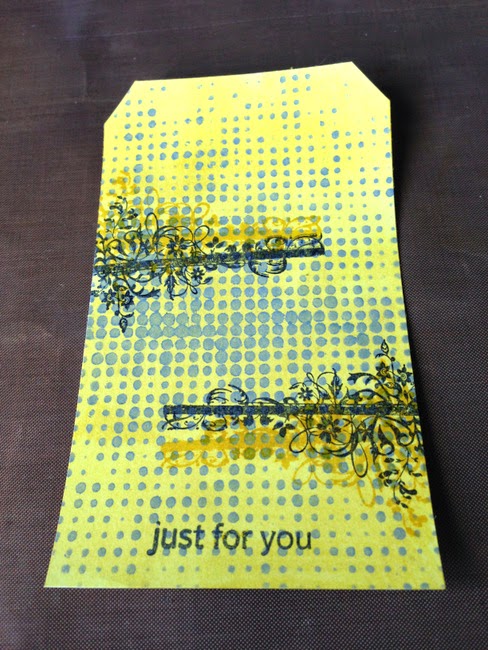


Yellow Tag

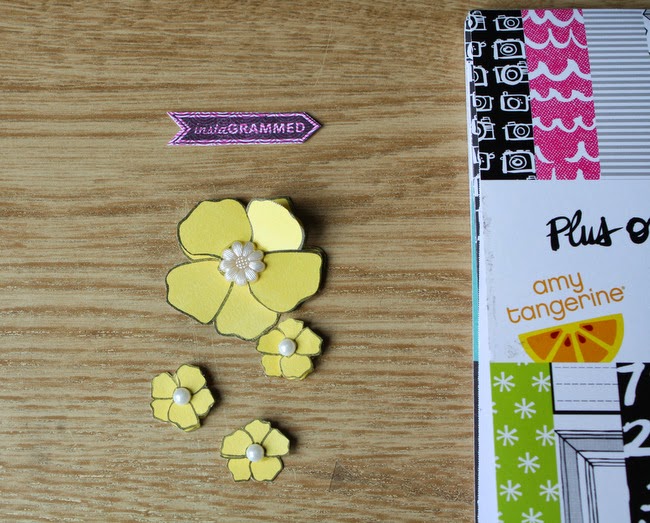
The faded dot stencil was used first this time, with some grey paint. A few dabs of Mustard Seed Ink mixed with water was used with the blending tool to cover the card. I added a stamped floral image, and to finish it off I layered up some papers with a Mustard Seed inked heart wood veneer.


 Here they all are again:


So, are you a fan of Tim Holtz products and techniques?
Please do share your Tim Holtz projects with us either by leaving a comment here on the blog or on our facebook page! 

Don't forget there's now a Ranger / Tim Holtz section in the shop HERE!

Louise x

Louise blogs projects full of intrigue and pops of colour over at Boys, Bugs, and Beautiful Buttons, please pop by and say hi!

Friday 2 May 2014

May Challenge - Bingo!

Hello and welcome to our May challenge! 

Did you know it's (Inter)National Scrapbooking Day (otherwise known as NSD!) tomorrow on the 3rd of May? Happy National Scrapbooking Day to you, we hope this challenge will give you some inspiration if you are crafting this weekend, and there's a chance to win a small prize if you enter!

Thank you to everyone who took part in our April Challenge, we loved looking at the entries, and we'll announce a few of our favourites and a winner here on the blog soon!

If you haven't seen our challenges so far this year, then here's how it works. Each month throughout 2014 we will set a challenge and we'd love it if you would play along. Each month the challenge will vary - sometimes we'll have a sketch, sometimes a colour palette, a photo inspiration or a "recipe" of stash to use or maybe a technique.

At the end of this post there is "linky tool" for you to link up your challenge entry so we can pop along and see and we will feature a few of our favourite projects next month. 

This time it's a BINGO Challenge!

Here's how to play ...

Select 3 boxes from the grid in a line (horizontal/vertical or diagonal) and include the items or technique in those 3 boxes on your project!

Eg: you may choose Ink, Metal, Bow (diagonal line) .... OR .... Transparent, Metal, Stamp (horizontal) but you couldn't select Transparent, Metal, Torn Paper as they are not next to each other in a line!


Here's some inspiration from the Design Team:

Louise:


 Louise was inspired by the top row of the bingo grid. She used Mr Huey Mist, a border punch across the bottom and a 1" circle punch. All supplies are from the March kit which included lots of the 7 Dots Studio "Illumination" Collection, with the addition of a blue cardstock, file tab, cotton and badge. 


Jenny also used the top row from the bingo grid: ink /mist, border punch, and circles. Her products include Kraft cardDistress ink (Weathered Wood), Glossy Accents, and Stickles.


Lisa-Jane selected the middle row: Transparent - Metal - Stamping 
Her supplies include stamps by Hero Arts, papers, stars, vellum and ephemera pack by Crate Paper Boyz Rule, enamel dots by Studio Calico and kraft cardstock.


Jimjams - for S J Crafts - March Illumination Kit & Insta Word Stickers

Jemma's page features holiday snaps of her daughter playing in the "Honey, I Shrunk The Kids" playground at Disney! She also chose the middle row:
Transparent stickers from a pack of Simple Stories Insta Clear Word StickersMetal word by Prima, and Stamps from her stash.  

The rest of the supplies are 7 Dots Studio products


Annie went for the middle vertical row and used a border punch, metal embellishment (staples), and torn paper - but in fact she ended up using mixed alphas and circles too, so it could just as well be the diagonal row bottom left to top right!

Her supplies include patterned papers, stickers and diecuts from the 7 Dots Illuminations collection, Studio Calico wood veneersSimple Stories DIY Typeset stickers and Burlap StickersPrima Alphas in black and one of the Prima stitched diecuts from the March kit.   


Jennifer chose a diagonal line from top left to bottom right on the bingo grid (Mist, a Metal Embellishment, a Knot). Her products include Heidi Swapp's Navy Color Shine Mist, Crate Paper's Boys Rule collection Zap & Top Score paper and some Wood Embellishments and Ephemera pieces, and some Studio Calico Cork Stars. Her metal embellies are an old key and some metal rimmed brads, and she has two knots - one in string under the title and one in bakers twine on the key.


We'll have a little mystery prize this month for one entry picked at random from all those who link up! The winner will be announced after the challenge has closed along with a few of our favourites! 

So, will you take up our challenge this month?

Use the linky tool below to add a link to the blog post (or your gallery) with your layout or card and a link back to this post is much appreciated.

You will need to ensure your link is added by the 31st of May (11.59pm).

Enjoy!

Monday 14 April 2014

Using Stickers For Starting Points!

Hello, it's Louise here today. Welcome to SJ Crafts.

Last month I used Amy Tangerines Plus One collection to create these layouts. Today I'm here to share with you another two layouts and some greeting cards using the same collection. This time my focus is on the Amy Tangerine's sticker sheet.


How many of us are guilty of buying collection kits that include a 12x12 sticker sheet? You know the sheets I mean, the ones that usually include an alpha set and word stickers.

I am definitely guilty of this, even when I purchase a few sheets of 12x12 paper or a small 6x6 paper pad I check to see if there is a sticker sheet to accompany them! 

It's safe to say that I have quite a selection of these 12x12 sticker sheets and most of them look very similar to this one.....


.....half used with stickers cut out, where I have placed them onto a project to see what they look like without sticking them down straight away.

Instead of putting this half used sticker sheet away with all the others I challenged myself to create a couple more layouts using a sticker as a starting point. Well, Amy Tangerine has designed a fun collection, it would be a shame not use all those stickers, wouldn't it?!

On the right hand side of the used sticker sheet I shared with you above, you will see where a long pink sticker sat. When I decided to use a sticker as a starting point I adhered this sticker to a sheet of 12x12 cardstock before I thought to take a photograph. From the whole sheet this is the one sticker that jumped out a me shouting "use me, use me", so after placing it on the cardstock I put it to one side knowing I would need to locate the photo I wanted to use.


In the meantime I selected a few more stickers that I knew would work with the second photo I'd chosen to scrap. I mixed the 12x12 sticker sheet with some of Amy Tangerine's puffy stickers. The large sticker "an everyday kind of adventure" was the sticker I'd chosen to base my layout around:


I started out with a sheet of white cardstock (it seems to be my "go to" supply at the moment), my photo and my adventure sticker. Placing the stickers and some Amy Tangerine cards from the 6x6 pad I started to build up my page:


This photo of me was taken on top of an open air bus on a tour of Liverpool city. There I was, in my element, taking lots of photos and in true British Style, the heavens opened. We had to move downstairs and as it continued to pour with rain, more people squeezed onto the bus, the windows steamed up and bang went my sightseeing photo taking tour :). This fun sticker collection included an Umbrella too. Just perfect.

Not only did I use a sticker to base my layout around, I used the alpha stickers and Amy Tangerine's Cards from the 6x6 paper pad to create my title....

My happy place is behind this camera.
 
Sunday Morning Routine

Remember the big long pink sticker from above....by now I'd located the photo that I'd had in mind to scrap with this sticker. A rugby photo no less. One where the funky socks would work well with the funky stickers, and one where this sticker would record our Sunday Morning Routine.

Really, this sticker I could have used again and again. It's a perfect sticker to use to record so many everyday things.

The sticker was used to create the title for my layout.


More Amy Tangerine stickers from the above sheet were used along with an Amy Tangerine badge and bradstudio calico stars and Mister Huey Mists.

As I went to photograph my layouts I moved my corner rounder across my desk and done something I haven't done in a long while. I corner rounded my layouts. I'd forgotten how much I like the look.

Cards

After completing the layouts I took another look at what was left on my sticker sheet and decided to make some cards using papers from Amy Tangerine's 6x6 paper pad and some of the remaining stickers.


First up is the Typewriter sticker. I trimmed down a sheet of 6x6 patterned paper from Amy Tangerine's pad and inserted side panels. The patterned paper is rather busy so the plain grey side panels tone it down a little. 


To add some texture I ran the paper through my sewing machine. It is a good idea to sew your paper before you stick it to your card. That way the stitching will not show on the inside of your card.


Adding a little stamped text, a badge and the typewriter sticker, there is a little card on it's way to a lovely recipient.

The world globe was the next sticker left on the sheet that I wanted to use. I took three patterned papers from the paper pad to layer and stitch.
The small grey hello sticker and alphas together made a greeting.  I added the globe, a few stars and twine and I have a card that I love.


Did you spot the teeny cloud on the above sticker sheet? Half way up on the right hand side under the orange umbrella! I wanted to use it and noticed that Amy Tangerines puffy stickers also had a teeny puffy cloud. Picking out three patterned papers again, I went for the house paper and layered and stitched along the top of the layered papers to add design and texture. With a few gems and the puffy house sticker I finished my card.


It feels good to have used up most of my sticker sheet. Amy Tangerine's stickers are inspiring and fun to use. I enjoyed using them so much that I'm now going to pop across to SJ Crafts shop to see what collection and sticker sheet I will purchase next.

So...   
  •  are any of you are going to admit to having lots of these half used sticker sheets? 
  • how many of you are now thinking you could use these stickers on your next project?
  • are you thinking about including a sticker sheet next time you shop for supplies? 

Please do leave us a comment and let us know.
Thank you for stopping by, have a lovely day! 

Louise x

To see more of Louise's inspiring craft projects check out her blog Boys, Bugs and Beautiful Buttons!

Tuesday 1 April 2014

April Challenge - A Spring-Time Mood Board!

Hello and welcome to our April challenge!

Thank you to everyone who took part in our March Challenge, we loved looking at the entries, and we'll announce a few of our favourites and a winner here on the blog soon!

If you haven't seen our challenges so far this year, then here's the "scoop" Each month throughout 2014 we will set a challenge and we'd love it if you would play along. Each month the challenge will vary - sometimes we'll have a sketch, sometimes a colour palette, a photo inspiration or a "recipe" of stash to use or maybe a technique.

At the end of this post there is "linky tool" for you to link up your challenge entry so we can pop along and see and we will feature a few of our favourite projects next month.  
There's even a little prize to be won - more on that further down!
We really hope lots of you will play along!

During April we'd love you to take your ideas from this mood board:


Take ideas from this however you choose. You could: 

Use the colours - Yellow, Green, Peach, White, Cork/Kraft
Use the quote 'Look How They Grow' 
Make a page about flowers or plants
Use some of the elements, eg. feathers and stars on your page 
Use the composition somehow (eg. two lines along the base of your project)
Or anything else you get from the mood board!

The SJ Crafts Design Team have created some projects to show what ideas they got from the mood board...


Louise took the composition of the mood board to put together a layout of a (rare) photo of her with her three sons. Her page supplies include the Teresa Collins Family Stories Collection Kitcamera and heart wood veneersenamel dots, and an Amy Tangerine Badge.


Annie was inspired by the mood board to create a pinboard-style page, following the composition and using sticky pearls and enamel dots to "pin" items to the background. To echo the fresh, spring colour palette she used peach/green/yellow/pink - the chalky pastels in the Chalk Studio 2 collection were perfect and contrast beautifully with the Chalk Studio chipboard pieces, frames and stickers. Other elements picked from the mood board added some interest and fun to Annie's page - washi tape, flowers, cork arrows and wood veneer stars. Finally, the quote inspired her journalling!
Jimjams - The Wrong Runes - April Challenge for SJ Crafts

Jemma was inspired by the 3 columns and the colours from the mood board to create a holiday album page.

Jenny:


Jenny was inspired by the colours and some of the elements on the mood board. She has used kraft card, some pretty yellow striped paper from MME Now & Then Mildred pad. Jenny printed her sentiment onto vellum to look like the title on the mood board, and added some paper flowers and adhesive pearls. 


Jennifer mainly took inspiration from the colours, using yellow, lime green, and some cork elements (including the American Crafts Cork Alphas and Arrows), though she swapped the coral hue for a bolder orange from the Amy Tangerine Cut & Paste collection. She also used some feathers, along with some Studio Calico Stars and Enamel Dots!


Taking her inspiration from the colours, gold highlights, the feathers and flowers Lisa-jane created a pretty card for a special girl's birthday. Those enamel dots finish it all off perfectly.

We have a little mystery "Spring themed" prize this month for one entry picked at random from all those who link up! The winner will be announced after the challenge has closed along with a few of our favourites! 

So, will you take up our challenge this month?

Use the linky tool below to add a link to the blog post (or your gallery) with your layout or card and a link back to this post is much appreciated.

You will need to ensure your link is added by the 30th of April (11.59pm).

Enjoy x

Friday 21 March 2014

One Step Further ... Stitching and Stamping!

Hello all, it's Louise here today! 

I want to show you something that's bright, that's fun, that's funky. It's Amy Tangerine's Plus One Collection!

A wonderful collection that I have really enjoyed using. Today I'd like to share with you how I've used Amy Tangerines Plus One Collection to build two layouts, adding stamping and hand stitching for texture, dimension and interest...


I had a handful of photos at the ready and eventually decided to go with three smaller photos. I roughly placed them on white card stock:


I flipped through Amy Tangerine's 6x6 paper pad umpteen times. All the papers are wonderful and any would have worked with a grid format I'd decided upon. Eventually I cut into two of the patterned papers and cut out a small word card and picture card. These were placed on the layout with the stitched feather tag.

Have you seen Amy Tangerines Plus One die cut tags? Some of them have holes in them for you to add stitching. A very clever idea, it means you can adapt them to suit your colour scheme, adding a dash of colour and texture at the same time!


Slowly (as I am a very slow scrapper) I added some more patterned paper pieces, wanting to fill in all the gaps I used Amy Tangerine's remark accents and sticker sheet and puffy stickers (my new addiction) and a fabric brad.

At this point I am only placing papers and stickers onto my page. Nothing will be stuck down until I am happy that everything is in the right place...

 You can see how the layout is coming together. I left a hole in the middle and decided to add a hand stitched heart using a template I have had in a draw for far too many years:


At this point I took a photo with my mobile phone. Mainly so that when I stuck all the pieces down I had something to refer back to....if needed (who am I kidding...I know I'll forget where everything goes), especially knowing that I'd be removing all the elements to add some Mr Huey Mist.


Before adding the mist..I went one step further and took out two roller stamps (like this one), adding rows of stars and hearts in places that I thought needed some added interest. I love how adding a stamp to a layout can give it a new look:


Clearing the page I used a mist  to add a few splashes to the stamped areas.

This is how my layout looks now. Everything is stuck down and a date stamp has been added. The feather has been stitched using pink cotton to blend with the other pink elements:


Hmmm....I wasn't happy though, my layout didn't feel finished.
I wonder how many of you have had that feeling from time to time?! 

Now, when I use stamps on a layout I tend to use them on the background paper/cardstock, as I have done this time. There are times when I use stamps to make my own embellishments and this is what I decided to do to finish off my layout.

Using a flower stamp I stamped directly onto a Amy Tangerine's paper and cut the flowers out. The paper has as Ombre effect and this stood out on the finished flower.  I hope from these photos you can see how this flower came together. Three Dimensional tape was used between each layer of the flower.


Still....my layout lacked something and that's when I decided to add some more little flowers, making them in the same way as the big one. All they needed was a pearl gem in the middle to finish them off.


I used a triangle stamp in the same way to make some tiny tiny bunting. 

Finally I was happy, taking this layout one step further with stamps and stitching has definitely made this layout for me. Would you agree?


 Here are some close up's so you can see some more of the details.
 

 Inspired yet to dust off your stamps and stitching templates?


If you are still unsure please carry on further and check out my second layout. Still using the fabulous Amy Tangerine Plus One collection. This layout will sit with the one I've just created as the photos were from the same evening and tell an Instagram selfie story.

I started in the same way. I picked some 6x6 Amy Tangerine papers and decided on a title using a tag from Amy Tangerines Die cut tags. To tie this page to the previous one I stitched another heart and freehand stitched the word "forever" this was after I used a roll stamp, to add some stamped hearts, stars and arrows.


I printed out the word and used a poky tool to make evenly spaced holes.
 
 Some more patterned papers pieces were added to the page.


I loved the flowers so much from the last layout that I made them again along with an Instagrammed stamp to create the arrow. 


The flowers and Amy Tangerines sticker sheet and puffy stickers were placed on the layout.

My layout is busy, fun, funky and bright. I liked it..so I got ready to stick everything down.


 The fabric black X brad looked wonderful on the top right corner. The orange bottom button didn't feel right. So after making a few minor changes, adding a black camera badge instead of the orange one, adding another printed word and to finish off with some of Studio Calico Stars.... I was happy that my busy layout was finished.


Here are some close up photos so you can see more of the details.


It's your turn now...
  • How do you feel about stamping on your projects?  I use stamps time and time again on my projects. When you cannot find the right embellishment of paper try pulling out your stamps. I bet you have something that will fit the occasion.
  • How do you feel about stitching on your projects? Maybe you have a stitching template hiding away somewhere ...pull it out and use it. You'll be surprised how much you like it!
  • Finally Amy Tangerine's Plus One Collection. What do you think? Is it bright, fun and funky enough for you. Please leave us a comment and link if you have/will purchase this collection and create with it.
Thank you for stopping by, I hope you have enjoyed this post as much as I enjoyed creating it. Louise x x x

Louise is a busy Mum of three boys and she blogs her wonderful crafts at Boys, Bugs, and Beautiful Buttons!