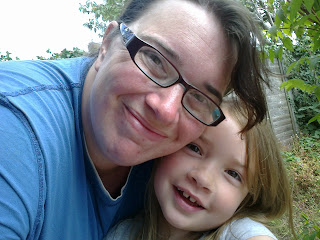
Hello, Jennifer here!
I hope you've had a wonderful Christmas and 2013 is bringing you lots of happiness and crafting time!!
I've been having some fabulous fun playing with the Studio Calico Burst Mask! I've got several projects and ideas to show you, and first up are are two layouts.
Magical Moments Layout
For this first layout, about my daughter at a Christmas parade, I used the mask in the simplest way - to fill the whole page. I began by spraying the back of the mask with removeable adhesive, to stop the mask moving as I misted, and I stuck it onto a piece of white cardstock.
I protected my surface with newspaper, and then spritzed all over the mask with Mr Huey's Honor Society Mist. To get an even coverage you need to move your hand quickly from left to right (or from right to left if you're left handed) as you are spraying.
Once the blue mist had dried a little, I carefully pulled the mask off. Remember not to leave the mask on too long if you've used adhesive on it, as it will end up getting stuck forever! About 5 minutes after misting should be okay. I then left the mist to dry completely for about an hour.
Once the blue mist was dry, I unscrewed the lids of Mister Huey's Calico White and Pretty Pink Mists, held the 'straws' over the layout, and tapped the lids with my finger to sprinkle drops of mist all over the page.
Once it was completely dry I trimmed the a little off each side, and mounted it onto some mauve cardstock.
Then I just had to add my photo and embellish the layout!
I used: My Mind's Eye All is Bright stickers from the Collection pack
MME Rhinestones and 6x6 Paper (for the journaling)
Studio Calico Wonderland Wood Veneer Snowflakes
and a few Hero Arts Clear Gemstones!
Little Angel Layout
For my next layout, I used the mask in a few different ways...
To start this layout, about my son when he was first born, I first misted a starburst in the top left corner. I covered the parts of the mask where I didn't want the mist to seep through. It's worth testing this on a spare piece of paper to check you get the size/shape you want. Once I had done my "test" piece I cleaned the mask and placed it on the piece of Sugar Cookie cardstock (I covered up the other holes too after taking this photo)
And then sprayed it a couple of times in the middle with Honor Society Mist. I pulled the mask off while the mist was still wet, and used the 'straw' of the Calico White Mist to flick streaks from the middle of the starbust out to the edges - make sure you clean the 'straw' before you put it back in the bottle!!
Next I created an a mat for the journalling, by blocking off all of the mask except one section of the 'burst'.
And then I sprayed this with My Huey Letter Jacket Mist.
A little word of warning if you do have a go at this technique - spray quite lightly.
On my first attempt I sprayed on way too much mist and it seeped below the mask and ended up looking like this!!
Not the look I was going for!
On my next attempt I was much more sparing with the mist and it came out much better.
I used another section on the burst as a template to cut out a piece of Studio Calico Hey Day 6x6 paper.
Which I placed below the red misted section
And added a piece of My Mind's Eye All is Bright Decorative Tape above the red section.
I checked where my photo was going to go, and added some detail to the top right corner, by covering up most of the Starburst Mask, leaving just a small arrow shape to point down at my photo.
I misted the "arrow" with Warm Calico Mist, and then outlined with a black pen so it was extra defined, and topped with a little sticker.
I then just off the layout, adding some droplets of White Calico Mist, and using the same stickers and alphas as the last layout, plus some All is Bright Decorative Brads. The cherub image was especially apt for the layout.
Hopefully this post has given you a few ideas for using the mask. I've used lots of ways all on one layout but you could use just one of the techniques.
I'll be back soon with some more ways to use the mask!
Jennifer x

See more of Jennifer's crafting on her blog: Jennifer's Jumbles


.jpg)
.jpg)


