Showing posts with label Design Team. Show all posts

Friday 24 January 2014

Heart - One Little Word for 2014!!

Hi there, its Lisa-Jane here today to share with you some of my One Little Word project. 

"One Little Word" is a workshop run by Ali Edwards which you can read more about here but basically it's about choosing a word to guide you through the year. Maybe instead of a list of resolutions that will probably be broken and then forgotten all about. There are other ways of combining your resolutions or intentions for the year with creative projects such as making a mini book of resolutions or document your thoughts for the year ahead on a layout,  but I've chosen this method as I also want to record my fortieth year over several layouts and focusing on my word will help me make some changes this year.

This year my word is heart.  
... I want to follow my heart 
... and love what I do and do what I love.  
... I want to love what I have.  

In other words, there are things that I've been neglecting or avoiding and I just have to look after those things (myself and my family) and do the things we all have to do (dreaded housework etc) with love rather than moaning about it.  I'll let you know if it works!

I wanted to have a strong colour scheme for this year long project to inspire me and give me energy in my supplies.  I wanted something with red in it too because I knew I would be using lots of love and heart motifs.  When I saw the Simple Stories Daily Grind collection it was literally an "Aha, that's it!" moment and I may have had to fan myself!!  Its funky, bold and upbeat with lots of references to days and months and the little things that we do regularly.

My project is going to be housed in a section of my normal 12x12 album so I wanted a striking title page.


The dark brown woodgrain Simple Stories paper with the printed elements in the corner was perfect for a one photo layout where I didn't actually want to journal very much.  That all comes later!  I also bought the ephemera pack, the Snap cards and the chipboard stickers to complement the project. All currently available in the shop right here! Working with all the coordinating papers and accessories like this really helps with making your supplies together, especially for a project that I will be dipping into all year.  It also make for speedy scrapping which is always a bonus in my book.

The little alpha stickers I've used for my title are in the collection pack and I've just added a few white Thickers for a bit more dimension.


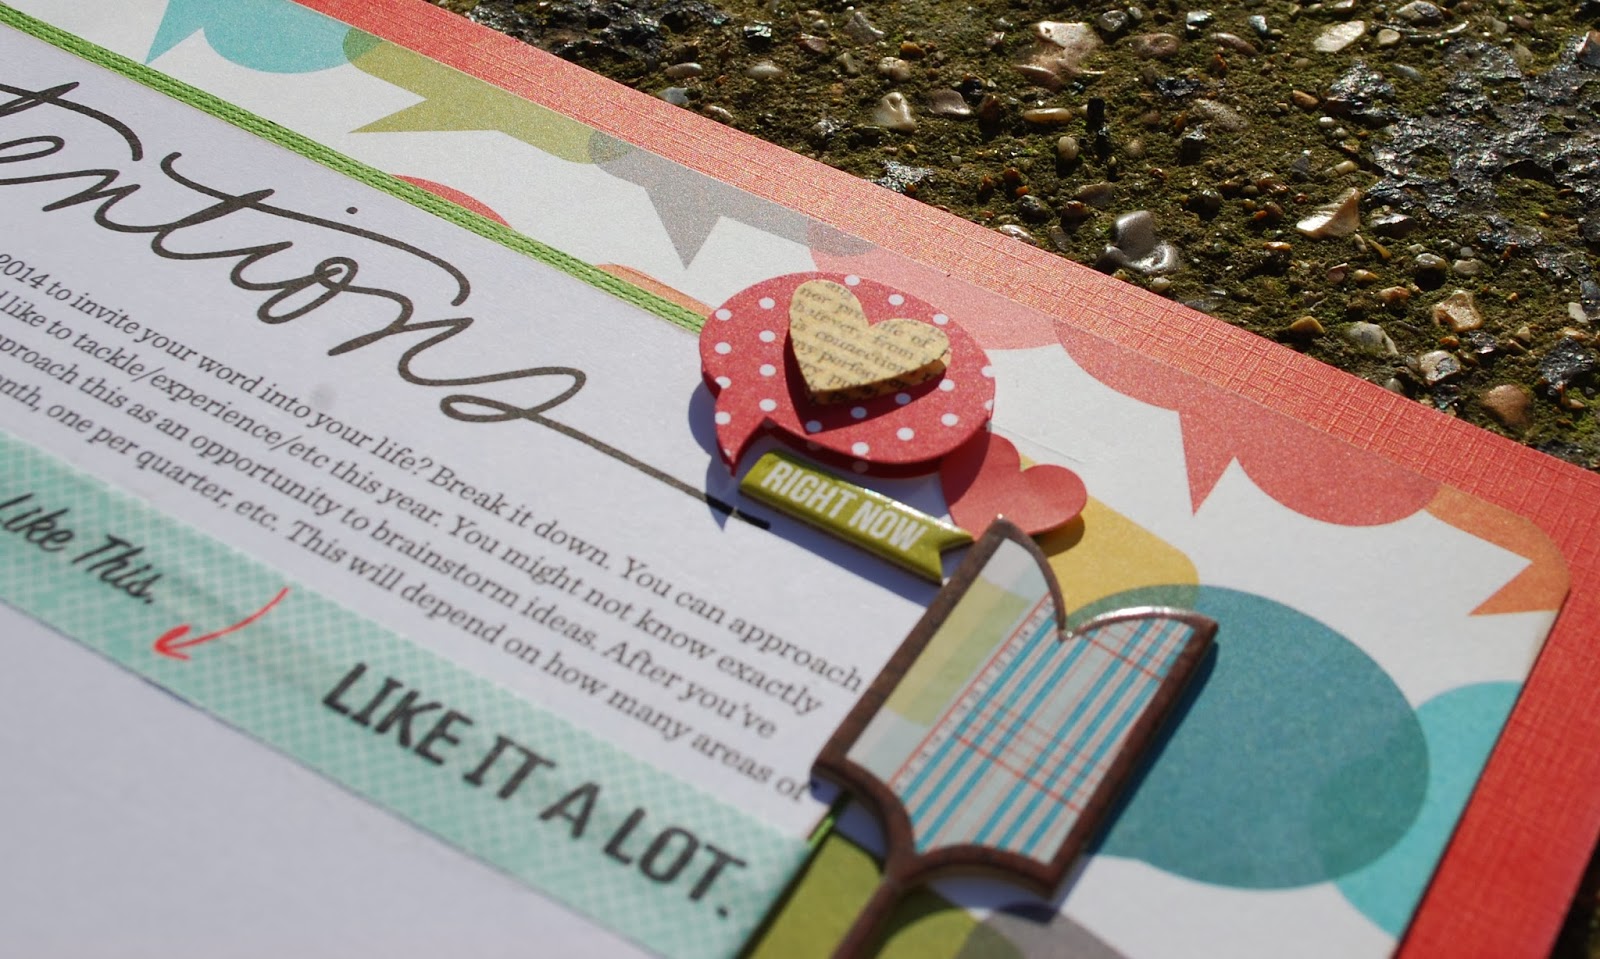
I'm using one of Ali Edwards's printables to record my thoughts and intentions and attached it to my background and added a few embellishments.  A lot of the project will be in pocket page protectors but as this page is the reverse of the title page, I wanted to make it work on a standard 12x12.

The red background cardstock is the reverse of the title page piece and I matted the "Intentions" sheet onto green cardstock to help it stand out a bit from the busy speech bubbles patterned paper. 


I'm really enjoying using these colourful papers and embellishments and I've already started working on my next pocket page with some definitions and quotes about my word for the year.


Using a collection that you really, really love is important for an ongoing project because it keeps you inspired and makes you WANT to keep using it and recording your journey with it.  I'm sure I will still love using it by the end of the year too.  

You can read more about my One Little Word journey throughout the year on my blog.

How about you?  Are you scrapping your intentions for the year?  How are you getting on with your New Year's Resolutions?  Whatever your plans, I hope 2014 is a great year for you all!

Lisa-Jane

Monday 20 January 2014

Introducing TWO New Design Team Members!!

You may recall towards the end of last year I put out a Design Team call.

The response was fantastic and I'd like to thank everyone who applied. There were so many talented Scrapbookers and it was so tough choosing but in the end after much consideration I finally came to a decision and today I'm excited to introduce you to the two talented ladies who will be joining the S J Crafts team for an initial 3 month term, and possibly longer!

So, first up please meet:

Annie Claxton


Hi there, my name is Annie and I’m chuffed to bits to be joining the SJ Crafts Design Team.

I live in a tiny cottage in Norfolk with my husband. I have two sons, a stepdaughter and two step-grandchildren who provide me with a constant source of photos for my scrapbooks.

Scrapbooking is my passion, but I also enjoy all sorts of other arts and crafts such as crochet, bead-making and drawing, and I love incorporating these into my pages. I make cards, tags and mini books too, and more recently I've been experimenting with art journals, smash books and "off-the-page" projects.

"Laugh, Love, Learn, Live" by Annie Claxton

My scrapping style is constantly evolving, but at the moment I love combining bright colours, layering patterns and using lots of contrasting textures to make fun pages like the example above which you can see more of here!
I often use recycled and found items and really enjoy creating unique homemade embellishments.

All my crafty ideas and endeavours are recorded on my blog, ArtyFartyAnnie along with a sprinkling of everyday life – I'd love you to pop over and say hello. 

**    **    **


And please meet our 2nd new DT member:

Jemma Sharrock


 Hello!  I’m Jemma and scrapbooking has been a passion of mine since 2006 when I went to an all-day "crop-in-a-shop" in Holland, raided my Dutch friend’s stash and then discovered the UKScrappers community.  My scrap-subjects are the family, our holidays and milestones and occasional randomness for my BOM (Book of Me).  While I wait for our kids (two boys and a girl) to find partners and produce grandchildren, I have to raid our photo-archives to scrap babies and toddlers.


"Around The World" By Jemma

My other hobbies include reading, vegetable gardening, sewing, the theatre and geocaching ... it's a good job that I only work part-time.
I have a blog - "Just Jimjams" where I post stories and layouts about our adventures in Cheshire (where we now live) and elsewhere.  While the mathematician in me likes clean and simple rather than messy and inky, my inner-crafter loves to hand-make embellishments and titles and sew on my pages. I’m really honoured to be joining the S J Crafts design team and can’t wait to get started!

**    **    **

So, a huge welcome to Jemma and Annie as they join the existing Design Team of Jennifer, Louise, Lisa-jane and Jenny who are all staying on for 2014!

You will see more of their work right here very soon but in the meantime please do pop over to their blogs and say Hi!!

Saturday 18 January 2014

I Believe We Can Make Magic!

Hello everyone, Jennifer here today to show you a layout using rub-ons to alter chipboard stickers and alphas coloured with pen... magic in scrapbooking as well as in my photo!

At the start of each year I like to think about things I believe in or that I'm wishing for, to keep in mind throughout the year. I have a firm belief that magic is real... perhaps not the wizarding kind, but certainly the magic we can make in moments small or large, when something makes us smile and we know the moment will be remembered forever...

I Believe We Can Make Magic:


This moment is certainly one to hold on to - I was so impressed with how many people put on Disney costumes to help me and my little sister celebrate at our joint birthday party ... I grinned all night long!

The letters that spell 'believe' are some Prima White Canvas Alphas, which I coloured with a Sakura Gelly Roll Pen to make them aqua. You can also use Sharpies to colour the alphas. Just make sure you leave the letters to dry thoroughly before you touch them again or you'll get inky fingers!


I used some Jenni Bowlin Doilies Rub Ons and Tiny Trims Rub Ons to add some extra pattern to the background ledger paper:


You can also use them to add details to chipboard stickers, like I've done here by adding some Tiny Trims to a camera from the Simple Stories Daily Grind Chipboard Stickers:


And I added some more trim to this black label-style sticker from the My Mind's Eye Chalk Studio Chipboard Elements:


The rub-ons stand out best when they are on plainer backgrounds - if you try anything to patterned then they will be harder to see.

Of course a page of mine wouldn't be complete without my usual sprinkling of gems and some Studio Calico Tiny Stars Wood Veneers for magical good measure!

What do you think? Have you any beliefs or wishes that you haven't documented? Get them onto a page and make sure you link us up so we can see too!

The alphas, rub ons, daily Grind Chipboard, wood stars and chalk elements are all available to order from the S J Crafts Shop!!

Bye, Jennifer x

Jennifer is Mum to two young children and blogs regularly at Jennifer Grace Creates .... pop over there soon as she is currently running a Giveaway to celebrate her happiness at recently moving house!!

Monday 30 December 2013

Decorated Frame for the New Year and Beyond!

Hello everyone!

Jennifer here today. I hope you all had a wonderful Christmas! 

I've started looking back over the year that's nearly finished, and looking forward to the year that's ahead. To try and channel good thoughts and welcome 2014 into my house I made this frame, which I can change the central panel of as the year goes by...


Want to make one for yourself? Here's how...

Step 1: Find a frame with a solid colour (woodgrain or patterns don't work so well for step 2) and take out any glass/plastic and backboards:


Step 2: Use some Jenni Bowlin Tiny Trims Gold Rub Ons to decorate the edge of the frame. I used triangles along two opposite edges and stars along the other two edges. If you want to make sure they go on straight then draw a pencil line with a ruler first as a guide - I didn't mind mine being a bit wobbly:


Step 3: Use a strong adhesive (I used a hot glue gun) to adhere three lengths of wire to the top of the frame at the back, and also a length of bakers twine a little below the top edge of the inner frame:


Step 4: Create a panel to hang inside your frame. I used the 'b' side of the Crate Paper Bundled Up 'Candy Cane' Paper layered onto some cream card. Then I decorated it with a Bundled Up Journal Card, a Chalk Studio Label Sticker, some Simple Stories Daily Grind Chipboard Stickers, Prima's White Canvas Alphas, and some Studio Calico Tiny Stars Wood Veneers. I also used a couple of Jenni Bowlin Doilies Gold Rub Ons.

Peg the panel onto the twine using some small pegs:


Step 5: Then use a few more Doilies Gold Rub Ons on some smooth white card - I used the white card that came as packaging in the rub ons packet! Fussy cut these out and glue them to the top of the wires:


I love how these look a bit like fireworks, but then in spring they could look like flowers, in summer they represent suns, in autumn they echo golden leafy trees, and in winter they are like pretty snowflakes - so I can use the frame all year round!

Then you just need to put the frame on display and smile each time you see it!

I wish you all a very Happy New Year!

In the meantime don't forget to check out our Design Team Call, and keep an eye on the Facebook Page for details of a sale that's coming soon!


Thursday 19 December 2013

Quick (Last minute!) Christmas Cards


Hi Jenny here today
How are your Christmas preparations going?
Not long until the 25th now!

This year, I seem to have got behind with all things Christmas and I have found myself in need of a few more cards. 

I thought I'd pop by and share with you some "super fast" cards in case you're like me and need a few last minute ideas!


I have used some of my Christmas dies to cut apertures behind which I have layered some scraps of Christmas papers. Then I have simply  layered this onto some coloured card and onto a card blank.


 I stamped a simple Christmas greeting underneath each aperture in black memento ink and added some stickles and flat backed gems as embellishments.


If you don't have a die cutting machine, you could achieve a similar affect using punches!


Have you finished making all your cards or are you needing a few more?

Happy Christmas!

Jenny x

See more of Jenny's cards over on her blog: Dragonllews Spot


Monday 16 December 2013

Fast Festive Scrapping with a Mini Book

Happy Monday to you! 
Louise is here today to show us some ideas to speed up our festive crafting!


Last week Lisa-Jane shared her process for telling her Christmas story in this post and this post! . She explained that gathering together and organising your scrapbook supplies helps with the whole Christmas Journal process. I really do second this and for several Christmas seasons this is exactly what I have done.

This year finds me restricted with my mobility. This limits the activities I might otherwise have been involved in over December which means unlike other years  I'm unlikely to have a daily photo. It has also meant that I've not been able to pull together all of my Christmas supplies.

It is still important to me that I record my Christmas however I didn't want the structure of a daily photo or entry so I started to think along the lines of a little book to hold some photos and record some stories in December, along with the big day itself.

Once I'd decided on the format for my little Christmas book - I found it a quick and easy project to undertake. This is an ideal project for a busy time of year, when lets face it most of us feel there aren't enough hours in the day.

Today I'd like to share with you five quick and easy steps to construct a little book for recording your family photos and stories during the month of December. 

There's also another five optional steps with ideas to help you add to your little book if you find you have more time available to craft than you thought, or if you find that you have more photos and stories you would like to include. Or you could add to it in January.

1. Restricting your supplies for a project can be more productive. If you are like me then you can spend hours looking for the right papers and embellishments. To narrow down your supplies use a Christmas collection Kit. I chose the gorgeous Echo Park's 'Tis The Season Kit perfect for this project. Within the collection kits you have your co-ordinated double sided patterned papers, including journaling cards, a sheet of alpha's and a sheet of festive stickers.


2. Pick out just one or two tools that you will use for the book.In addition to this Christmas collection kit I chose one punch (yes just one!) to use throughout the book.

3. Next, you will need to cut your papers to make the pages of the book.
I knew I wanted a smallish book so I selected some patterned paper from the collection kit for the pages and cut them to 6 x 7 inches.  I liked the squarish look of the album and decided to shape only the top cover into a tag shape. Of course, you can cut your pages to whatever size and shape you like.


I put a hole through the top of each page to hold them all together with a book ring.

4. Once you've got your pages and a front cover, you can use a few stickers to embellish. Try to limit yourself to using only the sticker sheets in the collection kit or if you're not using a kit choose just one or two sheets. This will make the whole embellishing process quicker and easier. I used stickers to decorate the front cover of my little book....(with a little help from the Teresa Collins Santa list sticker sheet, which in my defence just happened to be close to hand at the time!).


5. To complete the book you can add a page pocket to the back page of the book for somewhere to keep all of my Christmas memorabilia.


And that's all there is to it!
  
A little Christmas book all ready to be embellished and journalled in!


Optional Extras

Not only does a project of this type fit nicely around your hectic December schedule, it is also a superb project to add as many or as little pages as you like, when you like. Next Christmas....even!!

6. If you find that you have an hour to spare here and there, then you can add inserts or overlays. For example while I was waiting for the next few photos and stories to include in my Christmas book, I cross-stitched (freehand) this cute reindeer head from this pattern on Pinterest.


 I framed the reindeer and now it sits on top of the front cover.


7. Inserts can be in any form. Acetate pockets filled with confetti, decorative tags, envelopes for that special journaling. If you have the time and inclination these inserts can add interest and decoration to your book. This time I chose to
 include a glassine envelope to hold my children's Christmas wish lists.


8. At this busy time of year when we are trying to find the perfect present, inspiration can be lacking. This is the best time to consider a scraplift. I did it! I scraplifted a Christmas card (thank you Kandis Smith). It's a little inserted page that adds decoration to my book. Later on it will hold a photo and journaling.


9. Another quick and easy way I like to add interest to a project, is to add stitching. Hand stitching can be time consuming....so I dusted off my sewing machine. I do love how decorative stitching can transform a page.


10. Finally, no Christmas project is complete without bling. A pack of gems or enamel dots is a quick and easy way to bling up your little book.


I hope that this project has inspired you to put together a small book to record your Christmas. 

Please leave us a comment and let us know if it has!

I will be sharing the finished book on my blog after Christmas when I've recorded and included photos from Christmas day.

Happy Christmas Scrapping 

Louise x

Louise shares stories and her papercrafting projects at her blog Boys, Bugs, and Beautiful Buttons

P.S. Don't forget about our Design Team Call!

Friday 13 December 2013

Recording Christmas (Part Two)

Hello! Lisa-Jane here again to show you how I'm getting on with recording my Christmas so far!

How are you getting on with your festive crafting? 
Yesterday I explained a bit about my process for recording this year's Christmas memories. If you missed that post you can catch up on it right here!

I won't say that I'm behind or on target, because there is no ideal speed. I write something everyday and try and take photos when I can, and then I scrap them and write up the journalling the cards when possible, and often do a few days at a time. Even if you start documenting your Christmas from today, don't worry ... the important thing is capturing those memories!

Here's my first page and the first day!


The gorgeous pinky / red snowflake paper is actually the reverse of this page that I shared HERE.


When you are making a continuous album like this it can really help to stretch your stash and when the reverse of the page is so stunning it feels a shame to hide it.

I've used a few of the Crate Paper Bundled Up papers here as well as the Studio Calico Wood Veneer Tiny Stars to give a little bit of texture.


My first divided page is below. The photos are just a temporary print from my home printer so I could see where I wanted to put things, and where I wanted to overlap or use a small photo etc. As I've done each one I've put it into a separate folder on my computer so that when the holidays are finished and there is a suitable printing deal, I have everything that need to do a quick order with everything the right size.


The title pocket uses more of the Bundled Up papers with some ribbon and twine from my stash (actually the ribbon came from a cracker last year!) and the letter stickers are Echo Park's Reflection Falls Alpha Stickers which have that same beautiful deep cream. The dark green spotted paper at the bottom is from another current collection Simple Stories December Documented.


Below is the reverse of that page so far. The mitten print is the back of the ledger pattern that I used for a journalling block in the first side, and I will be using the snowman journalling card which is the reverse of the bottom left journalling card. This really cuts down my options which might not work for everyone, but I find that limiting my choices in this way helps to speed up the process. Of course if I don't want to use them in the end then I don't have to!


The pieces that I've used for the bottom left of this side were all off cuts. When I'm going a project like this I keep an A4 "slippy pocket" for all the scraps and half used pieces and this is where I head to first when I'm creating a new section of the page.

I've been asked a few times about having to make the back of the page work when you have designed around the front of the page. What if its not what you want? Well there are a couple of options here really. For me I will always make it work in the same way I would have done back in the days of only having 1 piece of patterned paper, or if you only had a 12x12 pocket. You design to what you have available! Alternatively you can just fill it with pretty things to make a pleasing section break and continue on with another protector on the facing page instead. 

It's worth keeping in mind that especially with longer term projects like this, we generally aren't looking for awards for our pages. I nearly always make pages that I would have tweaked if I was having another go, but the important things are that the memories are captured, the photographs stored safely and accessibly, and that we enjoyed the process. After all, we mostly do this for fun right?

We finally put our tree up now so I have many more memories to journal about. You'll find me in my craft room with a few festive scented candles and a Christmas CD playing.

Best wishes for Christmas and happy scrapping!

Lisa-Jane x

Lisa-Jane is a keen scrapbooker and crafter and has been posting lots of Christmas projects on her blog Inside My Head.

P.S. Don't forget about the Design Team Call HERE!

Thursday 12 December 2013

Recording Christmas (Part One)

Hello everyone! 
Today Lisa-Jane is here to share her method of recording the festive season!

Over to Lisa-Jane:

There are lots of different ways of recording and scrapbooking your memories of the holiday season .... through a specific class or by just doing your own thing. I tend to do a bit of Shimelle's Journal Your Christmas alongside my own recordings of our daily festive events. For me, documenting the story side of things is really important for taking a breather at this hectic time of year and helps me to focus on what really matters.

Hopefully this post will give you a few ideas to help you to record your Christmas! 

For many Scrappers, including me, scrapping a whole 12" x 12" page every day at this busy time is liable to induce insanity so I'm going to share my process with you - it's worked for me in previous years and keeps me sane and the stress to a minimum.

I find that a little preparation in the set up can help speed things up immensely. Even with eleven days of December already behind us you can still make preparations, because it will definitely help whenever you start.


Firstly, decide on what type and size of album or book you want to create. There's lots of options ... from albums of various sizes and shapes to mini books or envelope books (and more!)
I decided on using divided Page Protectors for a number of reasons. If I only have the time or inclination to do a little story or crafting then so be it, but on those days where I have a lot to record or more time for prettiness then that can be accommodated too. Some days I will fill all the pockets but other days I can just do a part of a page and have a clean separation from the following day which I wouldn't be able to do with a full 12x12.

I also find it helpful to decide on a collection of papers or a colour scheme.

I happened to have the Winter Project Life kit which is identical to Crate Paper's Bundled Up Collection. I really didn't NEED any more Christmas paper and I tend to be a traditional red and greens girl when it comes to Christmas.  However, when Sarah showed me the gorgeous papers and embellishments I let out a very loud "ooooh!" (You know what I mean don't you?  You've done that too, right?!) The B sides of even the full sized 12x12 papers are subtle enough to work really well in small pockets so I knew this collection had the versatility I needed for my eclectic album this year. While perusing the papers I also noticed that some of the new Maggie Holmes collection called Flea Market went really well with it too so I added some of those into the mix.  The deep cream, aqua and range of pinks are a perfect compliment and will really help to tell my story on the days which are not so festive too.


 For speed and preparation, I clear everything away from my desk and just have out the things I intend to use for this project. In addition to the papers above, I went through my stash and picked out some other (sometimes very old!) papers in the same colours. 

Another idea is to select some crafting tools and punches or dies that you will use and keep them close at hand.

I chose a few punches to use throughout the album. This means I don't have to keep returning to my punch draw and deliberating over which one to choose. It also lends continuity to the project as the same shapes crop up across the pages. I find that having the punches out like this also helps to give me a bit of inspiration on what to do in my individual pockets.


 For an ongoing project like this I like to have a few containers for the different elements that I intend to use. I have a bowl of Washi Tapes, a bowl of buttons and embroidery threads and a little heart shaped dish of small items like snowflake brads, sequins and Studio Calico Wood Veneer Tiny Stars. I also have a cake stand with adhesives in the top.  In the middle I have festive trims, ribbons and Enamel Dots, and in the bottom tier I have doilies, stickers, Project Life cards and other plain cards cut to various pocket sizes. This means I can just grab what I need and not have to think too hard about what to use. I also have a little bowl of Bundled Up Ephemera which are so cute and you get so many in the pack.


I also keep a pink pot of my most used tools and a variety of plain Cardstock to hand, some of which I cut to size. And my desk wouldn't be complete without a cup of tea and some Vintage Photo Distress Ink. Inking the edges brings all the collections together and again adds continuity throughout the album.


Here you can see some of the other things I've added from my stash like some old music paper, stickers and gold printed vellum. The album to the left is the one I am using this year. Its an American Crafts Modern Album so I just need to fancy up the plain front however I see fit but that might be a job for the new year.


So, gathering together all your supplies and tools in one place is my tip for scrapping your Christmas.

If you'd like to see how I'm getting on with my album then please do pop back tomorrow for Part Two!

Are you scrapping about the festive season this year? How are you hoping to achieve yours?  We'd love to see some of your ideas too so don't forget to link up in the comments.

Merry Christmas everyone!

Lisa-Jane x

Lisa-Jane is Mum to two small children and adores December and all things Christmas .... she blogs regularly at Inside My Head 

P.S. Want to join the SJ Crafts Design Team? See the DT Call HERE!

Tuesday 10 December 2013

SJ Crafts Design Team Call!

Would you like to join our Design Team?


Don't worry, the current Design Team aren't going anywhere right now, in fact I'm delighted that they've all just agreed to stay on for 2014! However I would like to expand the team so we are on the look out for another talented crafter (or maybe two!) to join us. The DT spot will initially be for a 3 month term (February - April 2014), with the possibility of staying on longer term.

Interested? Then read on for how to apply!
Don't worry if you've never been on a Design Team before - previous experience is absolutely not necessary! But you do need to be UK based and have your own active blog!

What we'll ask of the new Design Team Member(s):

  • Create projects/layouts and write at least two blog posts with clear photographs from each Design Team package of stash.
  • Upload these blog posts to the DT blog by a set deadline (we'll tell you more about how to do this once appointed!)
  • You must be prepared to post on your own blog with links to the S J Crafts shop and blog to coincide with your DT posts going live. We will also require that you have the SJ Crafts button on your blog sidebar.
  •  Actively participate on the SJ Crafts Facebook Page and assist with the positive promotion of SJ Crafts on any social media / forums you belong to. (eg: Facebook, Twitter, Pinterest, UK Scrappers). We will be looking for someone with a strong online presence!
  • You must be passionate about crafting! Our main customer base is scrapbookers, so we would prefer that  you enjoy some form of memory keeping, but other papercrafts like card-making or home-decor items would be helpful.
  • You must be able to work to deadlines, work well as a team and encourage and support the rest of the DT.
  • We are planning some special online/blog events during 2014 and should you stay on longer you will be asked to participate in the planning, promoting, creating and writing for such events.
What you receive for being on the Design Team:

  • You will receive a generous amount of papercrafting goodies to work with and to create projects/layouts for your DT posts.
  • Sometimes you will be sent additional items to use for special online/blog events.
  • A generous DT discount to use at S J Crafts for your own shopping throughout your DT term.
  • Links back to your own blog from the shop blog - both in our blog sidebar and your blog posts and special mentions on the SJ Crafts Facebook page and Twitter feed
  • You'll also get lots of encouragement and support from Sarah (SJ Crafts owner) and the rest of the team and hopefully you will enjoy the experience of being on the team.

Still interested? Yes? Then here's how to apply:
Send an email to dtapply@sjpapercrafts.co.uk by Monday 6th January 2014 11.59pm GMT

Your email should include:

Your Name
A little bit about you and your crafts (eg: what crafts you have experience in, how long you've been crafting, any current/past DT teams etc)
A Link To Your Blog
Details of (and if you can include links to) any Social Media/On line Forums/communities you participate in.
Photos and brief details of 3 of your craft projects which best showcase your craft talent (see below)

We would like you to include in your email application photos of 3 different projects (1 photo of each project only). If possible please ensure your photos are no bigger than 700pix square. If you want to show us more photos (such as more pages of a mini-book or detail shots of a scrapbook layout) then please provide a link to the blog post or online album where we can see the photos. Please don't attach more than 3 photos to the email. 

If you have written tutorials and/or tips on your blog in the past then you can include a link to one or two of these as well.

The new DT member will be contacted in the middle/end of January so they can be ready to join us for the start of February.

As I mentioned at the start please don't be put off if you've never been on a DT before or applied - We're so looking forward to hearing all about YOU!

Sarah x