Showing posts with label divided protectors. Show all posts

Friday 13 December 2013

Recording Christmas (Part Two)

Hello! Lisa-Jane here again to show you how I'm getting on with recording my Christmas so far!

How are you getting on with your festive crafting? 
Yesterday I explained a bit about my process for recording this year's Christmas memories. If you missed that post you can catch up on it right here!

I won't say that I'm behind or on target, because there is no ideal speed. I write something everyday and try and take photos when I can, and then I scrap them and write up the journalling the cards when possible, and often do a few days at a time. Even if you start documenting your Christmas from today, don't worry ... the important thing is capturing those memories!

Here's my first page and the first day!


The gorgeous pinky / red snowflake paper is actually the reverse of this page that I shared HERE.


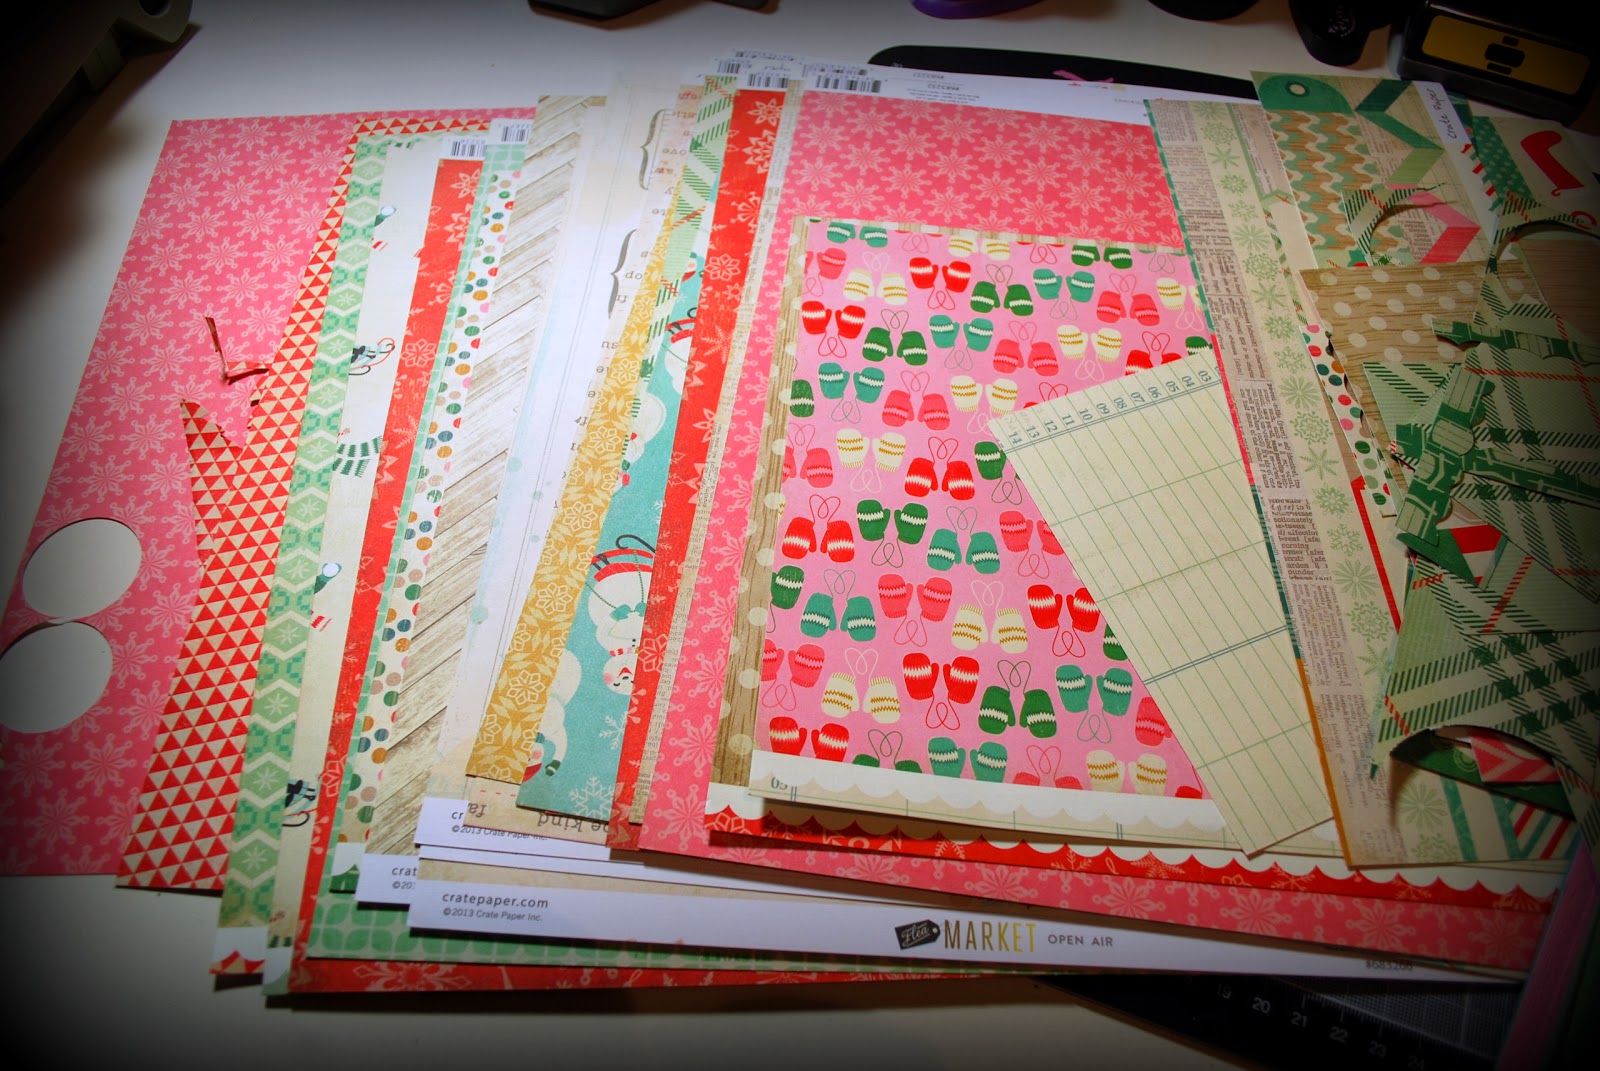
When you are making a continuous album like this it can really help to stretch your stash and when the reverse of the page is so stunning it feels a shame to hide it.

I've used a few of the Crate Paper Bundled Up papers here as well as the Studio Calico Wood Veneer Tiny Stars to give a little bit of texture.


My first divided page is below. The photos are just a temporary print from my home printer so I could see where I wanted to put things, and where I wanted to overlap or use a small photo etc. As I've done each one I've put it into a separate folder on my computer so that when the holidays are finished and there is a suitable printing deal, I have everything that need to do a quick order with everything the right size.


The title pocket uses more of the Bundled Up papers with some ribbon and twine from my stash (actually the ribbon came from a cracker last year!) and the letter stickers are Echo Park's Reflection Falls Alpha Stickers which have that same beautiful deep cream. The dark green spotted paper at the bottom is from another current collection Simple Stories December Documented.


Below is the reverse of that page so far. The mitten print is the back of the ledger pattern that I used for a journalling block in the first side, and I will be using the snowman journalling card which is the reverse of the bottom left journalling card. This really cuts down my options which might not work for everyone, but I find that limiting my choices in this way helps to speed up the process. Of course if I don't want to use them in the end then I don't have to!


The pieces that I've used for the bottom left of this side were all off cuts. When I'm going a project like this I keep an A4 "slippy pocket" for all the scraps and half used pieces and this is where I head to first when I'm creating a new section of the page.

I've been asked a few times about having to make the back of the page work when you have designed around the front of the page. What if its not what you want? Well there are a couple of options here really. For me I will always make it work in the same way I would have done back in the days of only having 1 piece of patterned paper, or if you only had a 12x12 pocket. You design to what you have available! Alternatively you can just fill it with pretty things to make a pleasing section break and continue on with another protector on the facing page instead. 

It's worth keeping in mind that especially with longer term projects like this, we generally aren't looking for awards for our pages. I nearly always make pages that I would have tweaked if I was having another go, but the important things are that the memories are captured, the photographs stored safely and accessibly, and that we enjoyed the process. After all, we mostly do this for fun right?

We finally put our tree up now so I have many more memories to journal about. You'll find me in my craft room with a few festive scented candles and a Christmas CD playing.

Best wishes for Christmas and happy scrapping!

Lisa-Jane x

Lisa-Jane is a keen scrapbooker and crafter and has been posting lots of Christmas projects on her blog Inside My Head.

P.S. Don't forget about the Design Team Call HERE!

Thursday 12 December 2013

Recording Christmas (Part One)

Hello everyone! 
Today Lisa-Jane is here to share her method of recording the festive season!

Over to Lisa-Jane:

There are lots of different ways of recording and scrapbooking your memories of the holiday season .... through a specific class or by just doing your own thing. I tend to do a bit of Shimelle's Journal Your Christmas alongside my own recordings of our daily festive events. For me, documenting the story side of things is really important for taking a breather at this hectic time of year and helps me to focus on what really matters.

Hopefully this post will give you a few ideas to help you to record your Christmas! 

For many Scrappers, including me, scrapping a whole 12" x 12" page every day at this busy time is liable to induce insanity so I'm going to share my process with you - it's worked for me in previous years and keeps me sane and the stress to a minimum.

I find that a little preparation in the set up can help speed things up immensely. Even with eleven days of December already behind us you can still make preparations, because it will definitely help whenever you start.


Firstly, decide on what type and size of album or book you want to create. There's lots of options ... from albums of various sizes and shapes to mini books or envelope books (and more!)
I decided on using divided Page Protectors for a number of reasons. If I only have the time or inclination to do a little story or crafting then so be it, but on those days where I have a lot to record or more time for prettiness then that can be accommodated too. Some days I will fill all the pockets but other days I can just do a part of a page and have a clean separation from the following day which I wouldn't be able to do with a full 12x12.

I also find it helpful to decide on a collection of papers or a colour scheme.

I happened to have the Winter Project Life kit which is identical to Crate Paper's Bundled Up Collection. I really didn't NEED any more Christmas paper and I tend to be a traditional red and greens girl when it comes to Christmas.  However, when Sarah showed me the gorgeous papers and embellishments I let out a very loud "ooooh!" (You know what I mean don't you?  You've done that too, right?!) The B sides of even the full sized 12x12 papers are subtle enough to work really well in small pockets so I knew this collection had the versatility I needed for my eclectic album this year. While perusing the papers I also noticed that some of the new Maggie Holmes collection called Flea Market went really well with it too so I added some of those into the mix.  The deep cream, aqua and range of pinks are a perfect compliment and will really help to tell my story on the days which are not so festive too.


 For speed and preparation, I clear everything away from my desk and just have out the things I intend to use for this project. In addition to the papers above, I went through my stash and picked out some other (sometimes very old!) papers in the same colours. 

Another idea is to select some crafting tools and punches or dies that you will use and keep them close at hand.

I chose a few punches to use throughout the album. This means I don't have to keep returning to my punch draw and deliberating over which one to choose. It also lends continuity to the project as the same shapes crop up across the pages. I find that having the punches out like this also helps to give me a bit of inspiration on what to do in my individual pockets.


 For an ongoing project like this I like to have a few containers for the different elements that I intend to use. I have a bowl of Washi Tapes, a bowl of buttons and embroidery threads and a little heart shaped dish of small items like snowflake brads, sequins and Studio Calico Wood Veneer Tiny Stars. I also have a cake stand with adhesives in the top.  In the middle I have festive trims, ribbons and Enamel Dots, and in the bottom tier I have doilies, stickers, Project Life cards and other plain cards cut to various pocket sizes. This means I can just grab what I need and not have to think too hard about what to use. I also have a little bowl of Bundled Up Ephemera which are so cute and you get so many in the pack.


I also keep a pink pot of my most used tools and a variety of plain Cardstock to hand, some of which I cut to size. And my desk wouldn't be complete without a cup of tea and some Vintage Photo Distress Ink. Inking the edges brings all the collections together and again adds continuity throughout the album.


Here you can see some of the other things I've added from my stash like some old music paper, stickers and gold printed vellum. The album to the left is the one I am using this year. Its an American Crafts Modern Album so I just need to fancy up the plain front however I see fit but that might be a job for the new year.


So, gathering together all your supplies and tools in one place is my tip for scrapping your Christmas.

If you'd like to see how I'm getting on with my album then please do pop back tomorrow for Part Two!

Are you scrapping about the festive season this year? How are you hoping to achieve yours?  We'd love to see some of your ideas too so don't forget to link up in the comments.

Merry Christmas everyone!

Lisa-Jane x

Lisa-Jane is Mum to two small children and adores December and all things Christmas .... she blogs regularly at Inside My Head 

P.S. Want to join the SJ Crafts Design Team? See the DT Call HERE!

Friday 7 June 2013

Beach Boardwalk Collection - Part 1 ~ By Louise

Hello Hello, Louise here today to share with you some of my projects made with the Carta Bella Beach Boardwalk Collection.

When Sarah emailed me to say she'd like me to work with either the Echo Park Perfect Summer or the Carta Bella Beach Boardwalk Collection Kit for my next DT project and which would I prefer .... my first thought was Echo Park please ... as I adore EP ... but then I looked at each collection a little closer and decided that the Carta Bella with it's blues and oranges was better suited to me and the photos I had in mind. Carta Bella please Sarah, I said.

I have never been more pleased ... the papers arrived and instantly I loved them. Normally I am a "B" side kinda girl, not this time the "A" sides are incredible, there are sharks, surfboards, flip-flop papers and much much more.
 
Look, see what I mean.....


Currently I am working on a holiday album. It's a mixture of 12 x 12 layouts, 12 x 12 with 4x6 pockets both horizontal and vertical and photo freedom page protectors. From this collection kit I have a mixture of projects to share with you over the next few days. I have made 12x12 layouts, a mini book and divided protectors. All using photos from a day at a Water Park.
 
First up is my layout "Fun Times With You". I want to keep a flow throughout my album and as I have used White Bazzill cardstock for my holiday layouts so far I wanted to use white again but the background needed something ... so I hooked out my Mister Huey Mists.


Selecting four of the mists which best suited the papers I set to work on the background.

As my theme is a water park I wanted waves and bubbles and droplets. I used a chevron and arrow stamp and some bubble wrap to help create this effect. After making a terrible mess, enjoying it immensely, this is what I ended up with.


All elements are from the collection pack and I've added the Studio Calico wood veneer hearts and arrows, you can find these here. (Out of stock at the moment but restocks due in soon!)


A little cose up so you can see the surf boards raised up and the dimension created by all the different textures within the cluster.


I moved on to a second page ..... and I thought you might like to see more of how I created the background. Again I gathered together some stamps, bubble wrap and my Mister Huey Mists.


I layered up some patterns and positioned the photo and papers onto the 12x12 white cardstock. I knew I wanted some elements in the top right hand corner and bottom left hand corner. I sprayed the middle of my chevron stamp directly with the Huey Mists and made sure that I blotted the stamp before placing it onto the cardstock. This was to get rid off the excess ink/paint and minimise the blobs of paint on the card. Spraying directly onto the bubble wrap with the yellow and stamping made for a muted effect which I liked. I knew my photo and papers would go in the centre of the cardstock I left this area clear.


Using the mists again, I created some droplets then started to layer up the papers and embellishment clusters. I added elements to the top right and mid-bottom left...with wood veneers. The wood veneers were inked for my first layout and misted for this layout. Both ways are really effective and give good coverage.


This is how  the final layout turned out ...

 
Lots of layering .... and a shark ... I adore the shark paper!


Top right cluster ...


You may notice that there is no journaling on these pages, this is because I saved it for the 4x6 pocket protectors. The background paper I chose here is one fantastic sheet of 12x12. I cut it into 6 4x6 rectangles and pieced them together with the photos. Again all elements are from the Collection Kit with the exception of the wood veneers.


Earlier in this post, I mentioned that I've also made a mini book to sit between these 12x12's .... you will need to check back here in a few days to see that! 
 
Thank you so much Sarah for letting me choose a Collection Kit that was a pleasure to work with.
 
Have a wonderful day!
 
Louise x
 
PS .... Just in case you haven't heard yet ... the new S J Crafts Bi Monthly kit has just gone on sale here!!
 
 
See more of Louise's work on her blog: Boys, Bugs and Beautiful Buttons

Saturday 16 March 2013

Studio Calico Snippets

Hello and a very happy weekend to you!

Louise here today to show you my projects made with the Studio Calico Snippets Collection!
 
My main supplies were:
 
Snippetts 6x6 patterned paper pad
Chipboard Arrows
Chipboard Cameras
 
All of which are available in the shop!
 
    This collection is perfect - it reminds me of bright summers days. Airy and light. The patterns are a mixture of bold and subtle, the colours being both bright and muted. What I like best about this 6x6 pad is that all the papers are single sided. You don't know what a weight off my mind it is not to have to choose between sides. The combination of colours and patterns is wonderful and suitable for all themes.

I'd like to share with you two 12 x12 layouts and several 4x6 horizontal mini cards/layouts. These layouts are for my holiday album which mixes 12x12 with 4x6 page protectors pockets.


The top two 4x6 cards will accompany a non beach/pool 12 x 12 layout in my album with the bottom two going next to to a 12 x 12 beach/pool layout.

First up is the beach/pool theme. I wanted a fresh bright feel to my holiday album and used the Bazzill white range of cardstock. The 12x12 layout is kept simple with lots of white space. The main focus being the photos.


The journaling is on the back of this page. I have so much to write for this holiday that occasionally there is too much to actually put on the layout. Here is my DH coming down the water slide with two of my boys in the pool waiting for him. He has a water camera in his hand, so while I take a photo of him (on the left), he is taking a photo of me (on the right). You might just be able to make me out in a black cosie standing with my feet firmly on the ground.

I fallen in love with the chipboard cameras and arrows. They are simply Cute!

The 4x6 cards and photos will go in the 4x6 page protector pockets next to the 12x12 layout in my album.


You can see I've used more of those gorgeous chipboard arrows with some titles and quotes.

For my second 12x12 layout I have chosen a non beach/pool theme. First of all I created a misted hexagon background.


To create this background I used an embossing folder. Spray your mist onto the raised side of your embossing folder, turn over and press onto your card/paper.

I used two mists here the Mister Huey Honor Society and Leaf Green

This amazing castle is the Harry Potter Ride in Florida. The title of this layout is taken from the words that my youngest son wrote about this ride at the end of the day.

More chipboard cameras and arrows.


As before, the 4x6 cards and photos will go into in the 4x6 divided page protector pockets next to the 12x12 layout.


Once again there is so much to journal for this page. Like.... how I came to have a photo of the "Public Convenience" sign and the story of the Harry Potter Ride, the Forbidden Journey. For this story in particular, the 4x6 card is a pocket which will hold all the details.


So.....I hope you like my Studio Calico projects. Making little 6 x 4 cards to go alongside 12 x 12 layouts is a great way to get all those extra details and photos into your album. I hope you might give it a go.  If you are still not sure I will be making plenty more 12x12 and 4x6 with this range so you may wish to keep an eye out over at my blog.


All these products can be purchased from SJ Crafts.

Thanks for stopping by today

Louise x

Don't forget to visit Louise's blog at : Boys, Bugs and Beautiful Buttons