Showing posts with label cork. Show all posts

Friday, 27 June 2014

Holiday Layouts

The weather down here on the south coast has been glorious the last few weeks (although a bit cloudy today!) and the sunshine and warmth reminds me of holidays we've been on and this makes me want scrap my holiday pics!

This photo was from a holiday in Ibiza a few years ago and of course we took a whole load of photos of the scenery and each other but we had none of all 3 of us .... until the very last morning when we stopped for a drink in a little beachside cafe and realising the lack of "Us" photos asked the waitress to take a photo! Selfies weren't so popular then!


I used a sheet of Heidi Swapp Dreams Come True 12 x 12 paper for the background as it has a design similar to sun rays on it which fitted the theme perfectly. I began by layering up a few strips of patterned papers. The red "Life is Beautiful" paper, the little Adventure sticker and the doily sticker behind the journal card are all from Echo Park's Capture Life Collection. 


The title stickers are some old Jenni Bowlin alphas which were just the right red to remind me of the hot sun and matched my t-shirt. I kept the embellishment quite simple with a few more stickers, a resin flower and a "Summer" Flair badge from my stash (sorry I can't remember the brand/collection of some of the embellishments), cork arrows and a cork camera (with a red enamel dot on top), a handful of enamel dots and some drops of Colour Shine gold mist.

Down in the bottom left corner I stamped the little aeroplane and added the date. 

When I'm making a layout, I try to include a whole variety of different textures. So, apart from paper I'll aim to use at least 3 other textures. On this page I have cork, metal (the flair badge), the resin flower, enamel (dots), chipboard (the "live in the sun" embellie is a chip piece!) ink and mist so I think I've acheived (and exceeded) the three textured elements on this page. You could try including lace, ribbon, twine, thread, felt, acetate, vellum, buttons ....

I've also just seen that my daughter's cuddly bunny named Flopsy also sneaked into the photo and as she was her constant companion on the holiday I think I will add another line or two of journalling about Flopsy being in the photo too!!

Do you scrap holiday photos from years gone by when the weather reminds you of that holiday?

Have you ever added extra journalling to a layout after you thought it was all done?!

If you've made a holiday layout recently or included lots of different textures on a recent project or this post inspires you to do so, please do leave a link in the comments so we can stop by and see your work or why not post your layout to our facebook page - we'd love to see it!!


Thursday, 13 March 2014

Adding Texture with Cork and Wood!

Hi everyone, Annie here today!

I love using natural materials like wood and cork to add texture and depth to a layout. You can leave them natural, or add colour and pattern to them by stamping, painting, inking and so on. For this layout, I've altered some wood and cork embellishments to suit the style of this page about my favourite Uncle ...


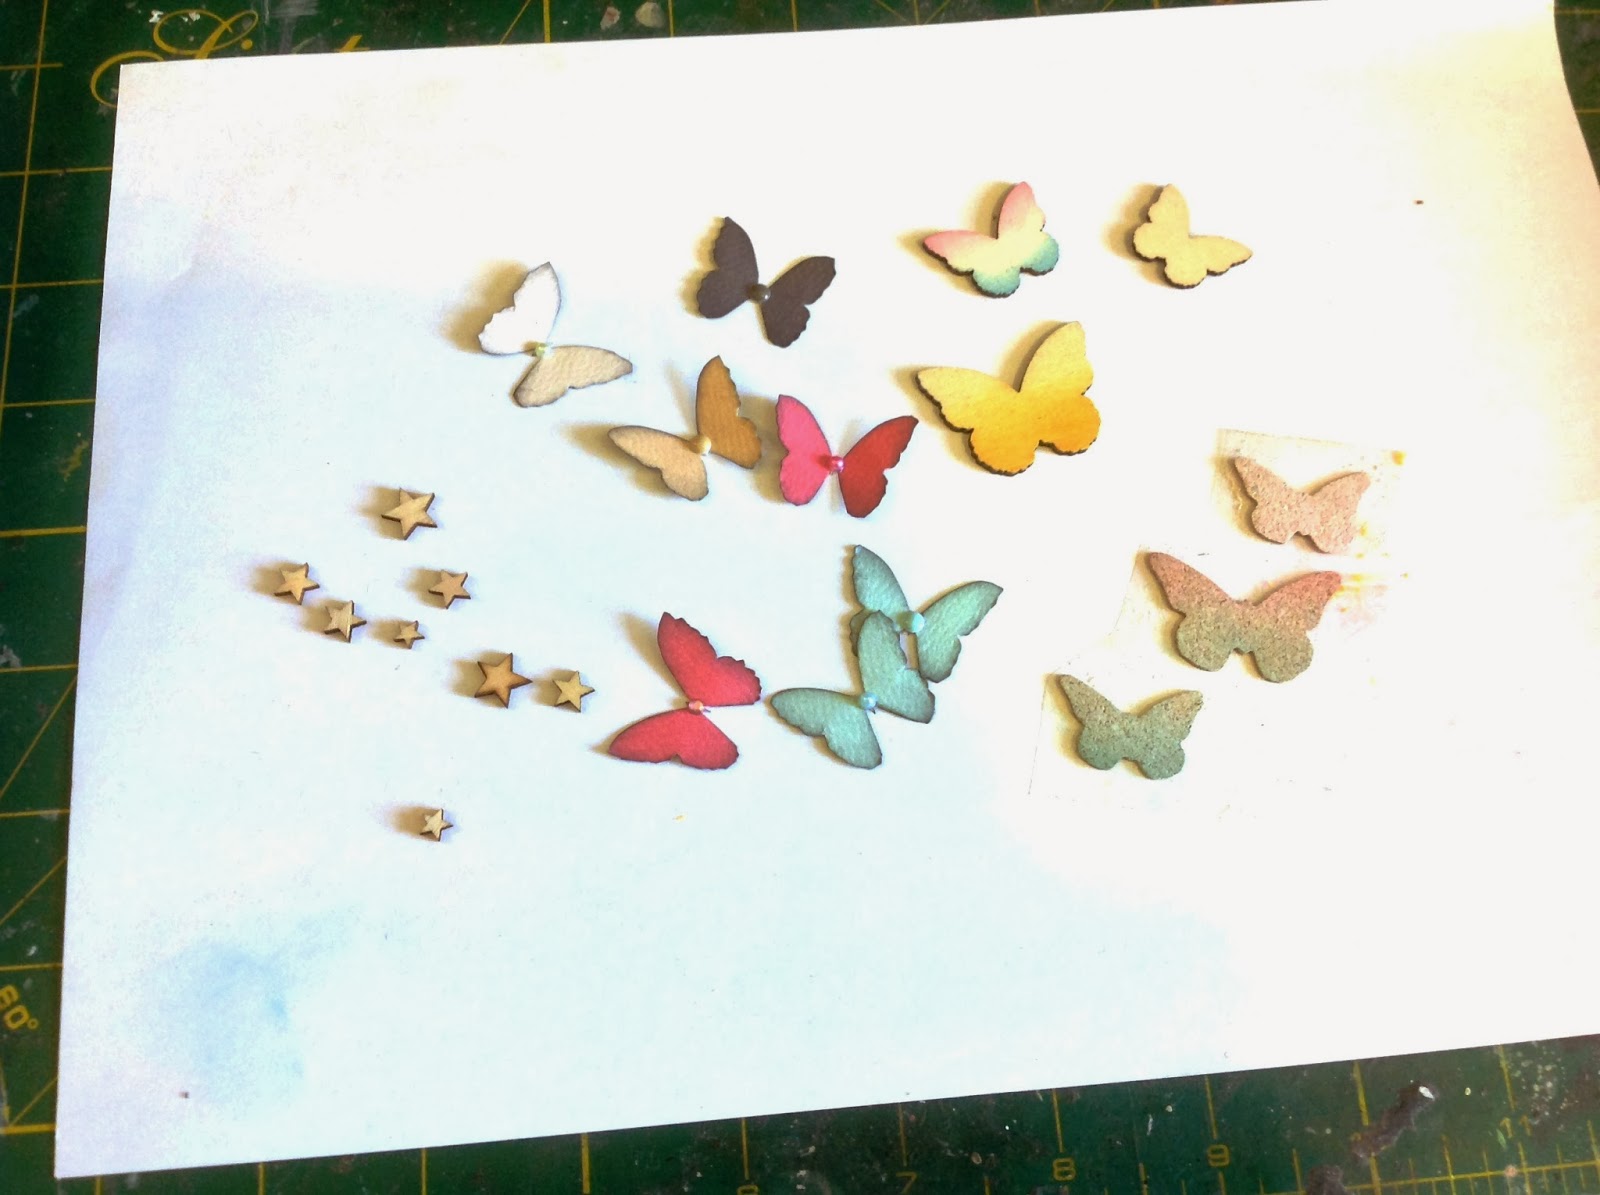
I still had loads of my February Kit left after using it to make my Flip Book Album, so I thought I would use some of it to make a page for Case File #113 over at CSI, because the bright pastels and all the butterflies in the Teresa Collins Daily Stories collection would be the perfect for the page I had in mind. Here are my leftovers ...


The kit included some Wood Veneer Butterflies by Studio Calico and a Prima Wood Word, and Sarah also sent me some Cork Sticker Butterflies to play with, so I thought it would be fun to mix it up and use the cork stickers and the wood veneers together.


I also threw in a handful of Wood Veneer Stars ... I love the contrast between the texture of the wood and the shiny Enamel Dots and Decorative Brads too - they really make you want to reach out and touch the page ... or is that just me?! :o)

The ledger paper from the collection made a perfect background for my layout and I used a couple of the cut-aparts and some scraps and offcuts to build up layers, distressing and inking the edges for extra dimension ...


Now for the butterflies to add a burst of colour and movement to my page ...


... some wood veneers, some cork stickers and some paper ones cut from a sheet of the patterned paper from the collection - these were lovely just as they were, but I couldn't resist experimenting with some Distress Inks, Paints and Stains ...


The paper ones were just inked all around the edges and finished with an enamel dot or pearl in the centre of each one. The wood and cork ones were given a base coat of Distress Stain in 'Picket Fence' and then I used different colours of Distress Ink and Paint to create an ombre effect - it looks much more subtle on the cork as you can see ...


To attach the paper butterflies to the layout, I added foam dots to the tops of the wings, then just a spot of glue to the centre - this lifts their wings off the page for a fluttery effect!

I love the look of the paper, wood and cork butterflies all mixed together and I'm sure there's lots more you could do with these - I might try stitching through the cork ones with embroidery thread and knotting it on the top ... now why didn't I think of that before?! 

Thanks for looking, and I hope you have fun playing with wood and cork on your pages!

Cheerio! Annie x

Annie recently joined the S J Crafts Design Team. She blogs her brilliant projects at her blog: Artyfarty Annie so please take a look there too!