Hello and welcome back to SJ Crafts, it's Louise here today.
Yesterday design team member Annie shared her wonderful wonderful projects and techniques using Tim Holtz products. If you missed that post you can see it right here!
Today I'd like to share with you how I used mine!
I've always admired Tim Holtz's 12 days of Christmas tags and over the years I've purchased a few of his inks and stamps. I've always thought that his products were rather dark and masculine though.... until recently, when SJ Crafts stocked his new mini stackable ink pads.
I get through a lot of ink pads (especially black ones) and most of them don't last long at all. The Tim Holtz distress inks that I've had for years still ink as well as they did on the day I brought them. With this in mind I went for Kit 1 mainly for their vibrancy....and to accompany them the Faded Dot Stencil.
A few evenings after my new inks and stencil arrived I was perusing Pinterest when I came across some Tim Holtz layering videos....Annie shared some links yesterday. I watched with interest... even though I don't have all of the products he uses I took some things with me... for example, making sure each layer is dry before adding another and mixing the ink with a spray of water. I located my heat gun and water spray (note to self...do not leave water in your spray bottle for a long time..ewww!).
Annie has already given you some detailed step by step techniques... so here's a quick run through mine.
Blue Tag
1. I started out with some cream card stock, cut into a tag, the faded dot stencil, Peacock Feather Ink and black ink. Using washi tape to hold the stencil in place I took my Blending Tool, black ink and in spiral motions (as Tim demonstrated) rubbed through the stencil.
2. Remembering to dry the layer with my heat tool!
3. Next I dabbed the ink pad to my craft sheet and added a few squirts of nice clean water. Using my blend tool I mixed the two together and added the colour to the tag. Adding the water distresses the ink further giving it a lighter effect.
4. Again I dried the layer. Once the layer was dry I added some stamps using black ink. I did use the blue ink (without watering the ink down) with a scroll stamp and you'll see that the stamped scroll stands out even though its stamped in the same colour.
With each tag after this I tried out something different...
Pink Tag
I stamped and heat embossed a feather image, then added Picked Raspberry Ink through the faded dot stencil. The background Picked Raspberry ink was watered down and added to the card with the blending tool. A text stamp was used along the side of the tag again with the ink pad. A little ribbon, twine and embellie with some machine stitching finished it off nicely.
Orange Tag
This time I stamped the circle images first in Spiced Marmalade Ink, after drying the ink I sprayed a few squirts of water to the Spiced Marmalade Ink that I'd dabbed onto the craft sheet. When added this dries lighter allowing the darker inked image to show through. After the Faded Dot Stencil was placed over the top, used with black ink.
Yellow Tag
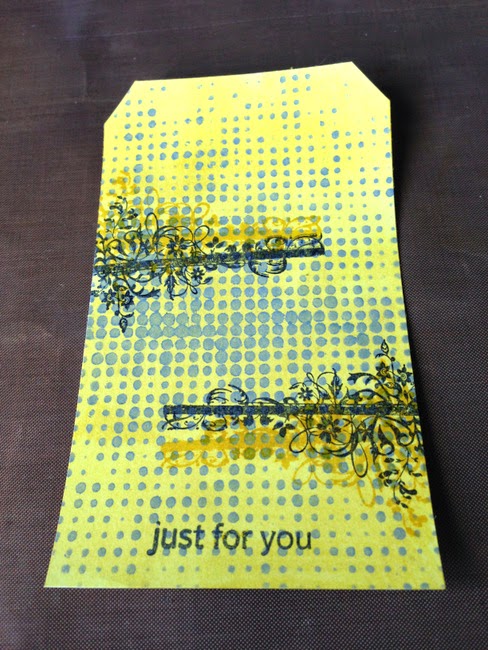
The faded dot stencil was used first this time, with some grey paint. A few dabs of Mustard Seed Ink mixed with water was used with the blending tool to cover the card. I added a stamped floral image, and to finish it off I layered up some papers with a Mustard Seed inked heart wood veneer.
Here they all are again:
So, are you a fan of Tim Holtz products and techniques?
Please do share your Tim Holtz projects with us either by leaving a comment here on the blog or on our facebook page!
Don't forget there's now a Ranger / Tim Holtz section in the shop HERE!
Louise x
Louise blogs projects full of intrigue and pops of colour over at Boys, Bugs, and Beautiful Buttons, please pop by and say hi!


