Friday 21 March 2014

One Step Further ... Stitching and Stamping!

Hello all, it's Louise here today! 

I want to show you something that's bright, that's fun, that's funky. It's Amy Tangerine's Plus One Collection!

A wonderful collection that I have really enjoyed using. Today I'd like to share with you how I've used Amy Tangerines Plus One Collection to build two layouts, adding stamping and hand stitching for texture, dimension and interest...


I had a handful of photos at the ready and eventually decided to go with three smaller photos. I roughly placed them on white card stock:


I flipped through Amy Tangerine's 6x6 paper pad umpteen times. All the papers are wonderful and any would have worked with a grid format I'd decided upon. Eventually I cut into two of the patterned papers and cut out a small word card and picture card. These were placed on the layout with the stitched feather tag.

Have you seen Amy Tangerines Plus One die cut tags? Some of them have holes in them for you to add stitching. A very clever idea, it means you can adapt them to suit your colour scheme, adding a dash of colour and texture at the same time!


Slowly (as I am a very slow scrapper) I added some more patterned paper pieces, wanting to fill in all the gaps I used Amy Tangerine's remark accents and sticker sheet and puffy stickers (my new addiction) and a fabric brad.

At this point I am only placing papers and stickers onto my page. Nothing will be stuck down until I am happy that everything is in the right place...

 You can see how the layout is coming together. I left a hole in the middle and decided to add a hand stitched heart using a template I have had in a draw for far too many years:


At this point I took a photo with my mobile phone. Mainly so that when I stuck all the pieces down I had something to refer back to....if needed (who am I kidding...I know I'll forget where everything goes), especially knowing that I'd be removing all the elements to add some Mr Huey Mist.


Before adding the mist..I went one step further and took out two roller stamps (like this one), adding rows of stars and hearts in places that I thought needed some added interest. I love how adding a stamp to a layout can give it a new look:


Clearing the page I used a mist  to add a few splashes to the stamped areas.

This is how my layout looks now. Everything is stuck down and a date stamp has been added. The feather has been stitched using pink cotton to blend with the other pink elements:


Hmmm....I wasn't happy though, my layout didn't feel finished.
I wonder how many of you have had that feeling from time to time?! 

Now, when I use stamps on a layout I tend to use them on the background paper/cardstock, as I have done this time. There are times when I use stamps to make my own embellishments and this is what I decided to do to finish off my layout.

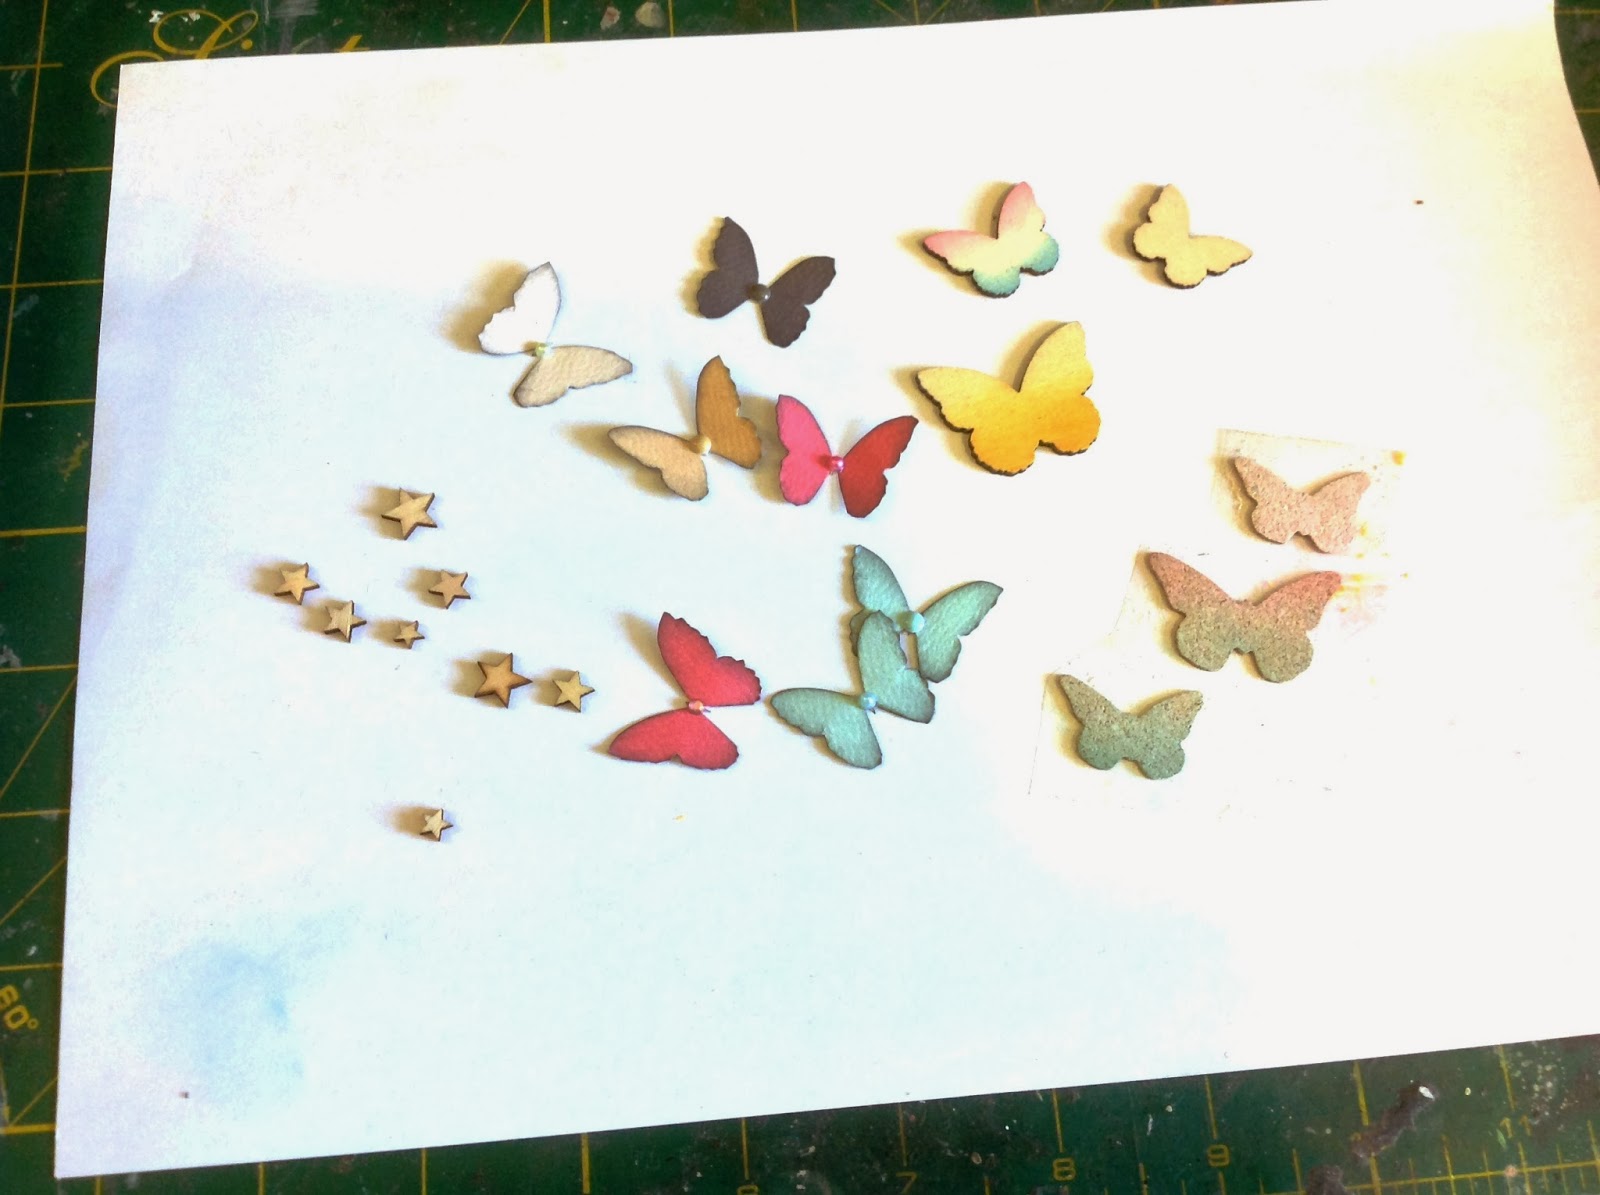
Using a flower stamp I stamped directly onto a Amy Tangerine's paper and cut the flowers out. The paper has as Ombre effect and this stood out on the finished flower.  I hope from these photos you can see how this flower came together. Three Dimensional tape was used between each layer of the flower.


Still....my layout lacked something and that's when I decided to add some more little flowers, making them in the same way as the big one. All they needed was a pearl gem in the middle to finish them off.


I used a triangle stamp in the same way to make some tiny tiny bunting. 

Finally I was happy, taking this layout one step further with stamps and stitching has definitely made this layout for me. Would you agree?


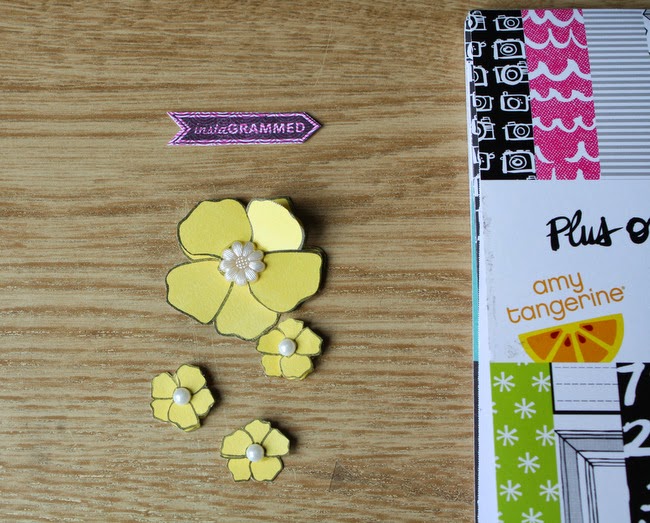
 Here are some close up's so you can see some more of the details.
 

 Inspired yet to dust off your stamps and stitching templates?


If you are still unsure please carry on further and check out my second layout. Still using the fabulous Amy Tangerine Plus One collection. This layout will sit with the one I've just created as the photos were from the same evening and tell an Instagram selfie story.

I started in the same way. I picked some 6x6 Amy Tangerine papers and decided on a title using a tag from Amy Tangerines Die cut tags. To tie this page to the previous one I stitched another heart and freehand stitched the word "forever" this was after I used a roll stamp, to add some stamped hearts, stars and arrows.


I printed out the word and used a poky tool to make evenly spaced holes.
 
 Some more patterned papers pieces were added to the page.


I loved the flowers so much from the last layout that I made them again along with an Instagrammed stamp to create the arrow. 


The flowers and Amy Tangerines sticker sheet and puffy stickers were placed on the layout.

My layout is busy, fun, funky and bright. I liked it..so I got ready to stick everything down.


 The fabric black X brad looked wonderful on the top right corner. The orange bottom button didn't feel right. So after making a few minor changes, adding a black camera badge instead of the orange one, adding another printed word and to finish off with some of Studio Calico Stars.... I was happy that my busy layout was finished.


Here are some close up photos so you can see more of the details.


It's your turn now...
  • How do you feel about stamping on your projects?  I use stamps time and time again on my projects. When you cannot find the right embellishment of paper try pulling out your stamps. I bet you have something that will fit the occasion.
  • How do you feel about stitching on your projects? Maybe you have a stitching template hiding away somewhere ...pull it out and use it. You'll be surprised how much you like it!
  • Finally Amy Tangerine's Plus One Collection. What do you think? Is it bright, fun and funky enough for you. Please leave us a comment and link if you have/will purchase this collection and create with it.
Thank you for stopping by, I hope you have enjoyed this post as much as I enjoyed creating it. Louise x x x

Louise is a busy Mum of three boys and she blogs her wonderful crafts at Boys, Bugs, and Beautiful Buttons!

Wednesday 19 March 2014

Very Versatile Vellum

Hello everyone, Jemma here today with my first official DT post!

The *star* of the supplies that I received in my DT package from SJ Crafts really has to be this sheet of starry vellum from Crate Paper's Boys Rule collection. It is just so versatile!

I've already used it to add interest and tone down some brightly coloured stripes on this page:


Which I made for the March Photo Inspiration Challenge ... there's still time to enter and have a chance of a prize too! 

I knew it would also be great to use for a home-made pocket for extra photographs ...

Jimjams - Layout detail - Vellum Pocket - for SJ Crafts

... and for a cute little tag for pulling the photos out of the pocket too.  I couldn't resist using the vellum for another tag tie elsewhere on my page:

Jimjams - layout detail - vellum tag tie - for SJ Crafts

I've squeezed in 10 mini photos (and 4 more in the vellum pocket) but, having trimmed them down a little from the original 3x4, I realised that the cute polaroid frame in the Boys Rule journalling cards pack no longer fitted.  No problem though because I used it as a template to make my own vellum frames:

Jimjams - layout detail - vellum frame - for SJ Crafts

The wonderful thing with a vellum frame is that you can still see the edges of the photo.  The even better thing about making your own frames is that you can have more than one!

Jimjams - Layout - Crazy Characters LHS - for SJ Crafts

That's the left hand side of my double page spread.  Can you spot another use of the starry vellum?

Jimjams - Layout - Crazy Characters RHS - for SJ Crafts

And here's the right hand side.  A busy, busy pair of pages for a character-full few days in Florida in 2004.  Using the pocket also allowed me to hide the two photos containing green costumed creatures as there's no green in the papers I've used (Arcade and Champ):

Jimjams - Layout - Crazy Characters DLO - for SJ Crafts

The addition of wooden elementsstickers and journalling cards added to the business so I had to doodle around the title letters cut from Rad to help them stand out a little more.

I count 5 uses of the vellum ... but my mind is still buzzing with a couple more ... and there's still a small square of my original sheet left, so I'm off to play!

Bye for now, Jemma x

Jemma is one of our newest DT members and she blogs projects full of fabulous ideas at Just Jimjams - please stop by and say hi!

Monday 17 March 2014

Mother's Day Card and Tea-Lights Gift Box!

Hello everyone, it's Jenny here today!


Mother's Day is coming on the 30th of March, so I've got a little Mothers Day set to show you - a card and a matching box which holds 4 tea lights!  


For my card I started with a scalloped card blank. I cut a 14 x 14cm piece off a 12 x 12" sheet of paper from the new Teresa Collins Daily Stories collection, this sheet is called 'Flowers'. I rounded the corners off and inked the edges with Milled Lavender Distress Ink. The sentiment is a digital stamp from Pink Petticoat which I cut out using Labels 1 Nestabilities Dies, again I have inked the edges. To finish the card off I added a die cut rolled rose and swirl, a tiny punched butterfly and some of the gorgeous Woodgrain Studio Calico Enamel Dots.


Onto the little box... 


Starting with a piece of card measuring 14 x 29cm, score at 8 cm, 16 cm, 18cm, 26cm and 28cm along the long edge, and 1cm, 3cm, 11cm, and 13cm along the short edge. I've drawn up a little template to help to show what your card should look like once you have scored the lines:


The bits I have shaded in purple you need to cut off and discard so that it ends up looking like this:


You can see I have cut out a window with my Labels 1 dies and I have rounded and angled some of the flaps. Behind the window I attached some acetate. Fold the box up the and stick it together remembering to leave an open flap so you can fill it with your tea lights! 


I used some more of the Teresa Collins paper to decorate the top inside and outside and around the edges, before I stuck this down I attached a piece of ribbon the the lid which runs down the back of the box and underneath it to tie the box shut. I've printed another digital stamp to add to the top and decorated it to match my card. 


Here you can see the inside of the box with the tea lights.

I hope you have enjoyed my little project, and don't forget if you have a go at making one leave me a link so I can come and have a peek!


Jenny blogs her gorgeous cards and ideas over at Dragonllew's Spot, she'd love it if you pop by to say hello!

Thursday 13 March 2014

Adding Texture with Cork and Wood!

Hi everyone, Annie here today!

I love using natural materials like wood and cork to add texture and depth to a layout. You can leave them natural, or add colour and pattern to them by stamping, painting, inking and so on. For this layout, I've altered some wood and cork embellishments to suit the style of this page about my favourite Uncle ...


I still had loads of my February Kit left after using it to make my Flip Book Album, so I thought I would use some of it to make a page for Case File #113 over at CSI, because the bright pastels and all the butterflies in the Teresa Collins Daily Stories collection would be the perfect for the page I had in mind. Here are my leftovers ...


The kit included some Wood Veneer Butterflies by Studio Calico and a Prima Wood Word, and Sarah also sent me some Cork Sticker Butterflies to play with, so I thought it would be fun to mix it up and use the cork stickers and the wood veneers together.


I also threw in a handful of Wood Veneer Stars ... I love the contrast between the texture of the wood and the shiny Enamel Dots and Decorative Brads too - they really make you want to reach out and touch the page ... or is that just me?! :o)

The ledger paper from the collection made a perfect background for my layout and I used a couple of the cut-aparts and some scraps and offcuts to build up layers, distressing and inking the edges for extra dimension ...


Now for the butterflies to add a burst of colour and movement to my page ...


... some wood veneers, some cork stickers and some paper ones cut from a sheet of the patterned paper from the collection - these were lovely just as they were, but I couldn't resist experimenting with some Distress Inks, Paints and Stains ...


The paper ones were just inked all around the edges and finished with an enamel dot or pearl in the centre of each one. The wood and cork ones were given a base coat of Distress Stain in 'Picket Fence' and then I used different colours of Distress Ink and Paint to create an ombre effect - it looks much more subtle on the cork as you can see ...


To attach the paper butterflies to the layout, I added foam dots to the tops of the wings, then just a spot of glue to the centre - this lifts their wings off the page for a fluttery effect!

I love the look of the paper, wood and cork butterflies all mixed together and I'm sure there's lots more you could do with these - I might try stitching through the cork ones with embroidery thread and knotting it on the top ... now why didn't I think of that before?! 

Thanks for looking, and I hope you have fun playing with wood and cork on your pages!

Cheerio! Annie x

Annie recently joined the S J Crafts Design Team. She blogs her brilliant projects at her blog: Artyfarty Annie so please take a look there too!