Wednesday 19 March 2014

Very Versatile Vellum

Hello everyone, Jemma here today with my first official DT post!

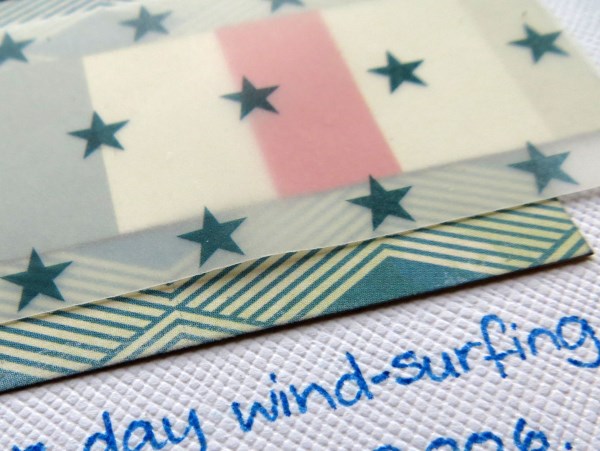
The *star* of the supplies that I received in my DT package from SJ Crafts really has to be this sheet of starry vellum from Crate Paper's Boys Rule collection. It is just so versatile!

I've already used it to add interest and tone down some brightly coloured stripes on this page:


Which I made for the March Photo Inspiration Challenge ... there's still time to enter and have a chance of a prize too! 

I knew it would also be great to use for a home-made pocket for extra photographs ...

Jimjams - Layout detail - Vellum Pocket - for SJ Crafts

... and for a cute little tag for pulling the photos out of the pocket too.  I couldn't resist using the vellum for another tag tie elsewhere on my page:

Jimjams - layout detail - vellum tag tie - for SJ Crafts

I've squeezed in 10 mini photos (and 4 more in the vellum pocket) but, having trimmed them down a little from the original 3x4, I realised that the cute polaroid frame in the Boys Rule journalling cards pack no longer fitted.  No problem though because I used it as a template to make my own vellum frames:

Jimjams - layout detail - vellum frame - for SJ Crafts

The wonderful thing with a vellum frame is that you can still see the edges of the photo.  The even better thing about making your own frames is that you can have more than one!

Jimjams - Layout - Crazy Characters LHS - for SJ Crafts

That's the left hand side of my double page spread.  Can you spot another use of the starry vellum?

Jimjams - Layout - Crazy Characters RHS - for SJ Crafts

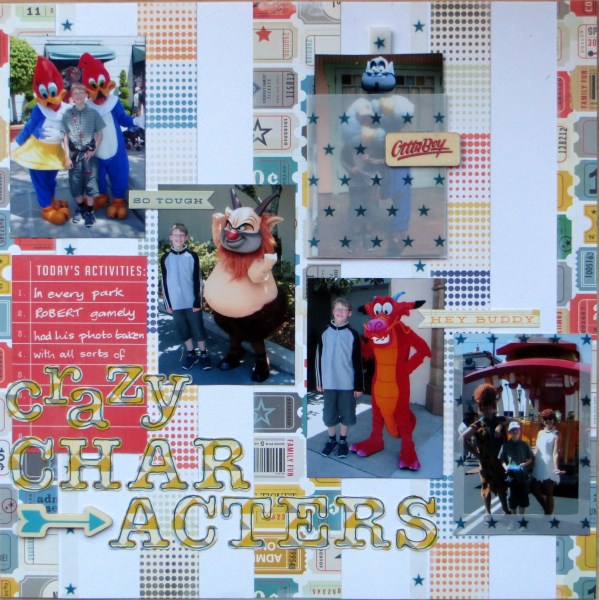
And here's the right hand side.  A busy, busy pair of pages for a character-full few days in Florida in 2004.  Using the pocket also allowed me to hide the two photos containing green costumed creatures as there's no green in the papers I've used (Arcade and Champ):

Jimjams - Layout - Crazy Characters DLO - for SJ Crafts

The addition of wooden elementsstickers and journalling cards added to the business so I had to doodle around the title letters cut from Rad to help them stand out a little more.

I count 5 uses of the vellum ... but my mind is still buzzing with a couple more ... and there's still a small square of my original sheet left, so I'm off to play!

Bye for now, Jemma x

Jemma is one of our newest DT members and she blogs projects full of fabulous ideas at Just Jimjams - please stop by and say hi!

Monday 17 March 2014

Mother's Day Card and Tea-Lights Gift Box!

Hello everyone, it's Jenny here today!


Mother's Day is coming on the 30th of March, so I've got a little Mothers Day set to show you - a card and a matching box which holds 4 tea lights!  


For my card I started with a scalloped card blank. I cut a 14 x 14cm piece off a 12 x 12" sheet of paper from the new Teresa Collins Daily Stories collection, this sheet is called 'Flowers'. I rounded the corners off and inked the edges with Milled Lavender Distress Ink. The sentiment is a digital stamp from Pink Petticoat which I cut out using Labels 1 Nestabilities Dies, again I have inked the edges. To finish the card off I added a die cut rolled rose and swirl, a tiny punched butterfly and some of the gorgeous Woodgrain Studio Calico Enamel Dots.


Onto the little box... 


Starting with a piece of card measuring 14 x 29cm, score at 8 cm, 16 cm, 18cm, 26cm and 28cm along the long edge, and 1cm, 3cm, 11cm, and 13cm along the short edge. I've drawn up a little template to help to show what your card should look like once you have scored the lines:


The bits I have shaded in purple you need to cut off and discard so that it ends up looking like this:


You can see I have cut out a window with my Labels 1 dies and I have rounded and angled some of the flaps. Behind the window I attached some acetate. Fold the box up the and stick it together remembering to leave an open flap so you can fill it with your tea lights! 


I used some more of the Teresa Collins paper to decorate the top inside and outside and around the edges, before I stuck this down I attached a piece of ribbon the the lid which runs down the back of the box and underneath it to tie the box shut. I've printed another digital stamp to add to the top and decorated it to match my card. 


Here you can see the inside of the box with the tea lights.

I hope you have enjoyed my little project, and don't forget if you have a go at making one leave me a link so I can come and have a peek!


Jenny blogs her gorgeous cards and ideas over at Dragonllew's Spot, she'd love it if you pop by to say hello!

Thursday 13 March 2014

Adding Texture with Cork and Wood!

Hi everyone, Annie here today!

I love using natural materials like wood and cork to add texture and depth to a layout. You can leave them natural, or add colour and pattern to them by stamping, painting, inking and so on. For this layout, I've altered some wood and cork embellishments to suit the style of this page about my favourite Uncle ...


I still had loads of my February Kit left after using it to make my Flip Book Album, so I thought I would use some of it to make a page for Case File #113 over at CSI, because the bright pastels and all the butterflies in the Teresa Collins Daily Stories collection would be the perfect for the page I had in mind. Here are my leftovers ...


The kit included some Wood Veneer Butterflies by Studio Calico and a Prima Wood Word, and Sarah also sent me some Cork Sticker Butterflies to play with, so I thought it would be fun to mix it up and use the cork stickers and the wood veneers together.


I also threw in a handful of Wood Veneer Stars ... I love the contrast between the texture of the wood and the shiny Enamel Dots and Decorative Brads too - they really make you want to reach out and touch the page ... or is that just me?! :o)

The ledger paper from the collection made a perfect background for my layout and I used a couple of the cut-aparts and some scraps and offcuts to build up layers, distressing and inking the edges for extra dimension ...


Now for the butterflies to add a burst of colour and movement to my page ...


... some wood veneers, some cork stickers and some paper ones cut from a sheet of the patterned paper from the collection - these were lovely just as they were, but I couldn't resist experimenting with some Distress Inks, Paints and Stains ...


The paper ones were just inked all around the edges and finished with an enamel dot or pearl in the centre of each one. The wood and cork ones were given a base coat of Distress Stain in 'Picket Fence' and then I used different colours of Distress Ink and Paint to create an ombre effect - it looks much more subtle on the cork as you can see ...


To attach the paper butterflies to the layout, I added foam dots to the tops of the wings, then just a spot of glue to the centre - this lifts their wings off the page for a fluttery effect!

I love the look of the paper, wood and cork butterflies all mixed together and I'm sure there's lots more you could do with these - I might try stitching through the cork ones with embroidery thread and knotting it on the top ... now why didn't I think of that before?! 

Thanks for looking, and I hope you have fun playing with wood and cork on your pages!

Cheerio! Annie x

Annie recently joined the S J Crafts Design Team. She blogs her brilliant projects at her blog: Artyfarty Annie so please take a look there too! 

Monday 10 March 2014

Echoing The Weather

Hi there, its Lisa-Jane here today with a layout inspired by the awful weather we had for the start of this year! 

I'm a firm believer in scrapping all aspects of life both good and bad and I wanted to remember the incredible floods and damage that we've had. One of the memories I wanted to capture was a walk we did at Christmas in Wales because when I went back a month later there was substantial damage to the dunes and the sea walls. There had already been one storm a couple of days before we got there and it continued to be very wet and very wind for the whole week making it difficult to get out and about.


I'd been using Crate Paper's The Pier collection for the SJ Crafts March Challenge and I thought it would work really well for this topic too, as it is still beach themed but the water colour design adds to the rain-washed feel. The doily paper ('Cotton Candy') echoes the clouds and I was still able to use lots of the bits of the Splash Cut Outs sheet even though it was nothing to do with swimming in the sunshine!

I added some hessian for texture, which is very on trend this season, and some Enamel Dots to echo the droplets of water everywhere.


Funnily enough, the weather has been quite nice since I did this layout and we've started to see lots of daffodils and crocuses popping up everywhere.  I really hope this is a sign of a turnaround in the wet weather and that the people that have been flooded can get back to normal really soon.

Did you record those dramatic weather patterns in any way?  We'd love to see - leave us a link here or post to our Facebook Page!

Bye for now, Lisa-Jane.

Lisa-Jane shares lots of her gorgeous crafty creations at her blog Inside My Head, go check it out!