Hello .... and welcome to the 3rd and final part of my celebration of love for 6x6 paper pads ... I did mention I love them didn't I? ... Yes I thought so!!
Today's project is a cute little mini book project. I wasn't sure what size of book I was going to make until I saw this one by Jen Gallacher. I used the cut-apart journalling cards from the 12 x 12 sheet in the Everyday Eclectic collection kit as the base and added in some more pages by cutting a few of the 6x6 designs down. These double sided papers are ideal for mini books and the quality means they are pretty sturdy too.
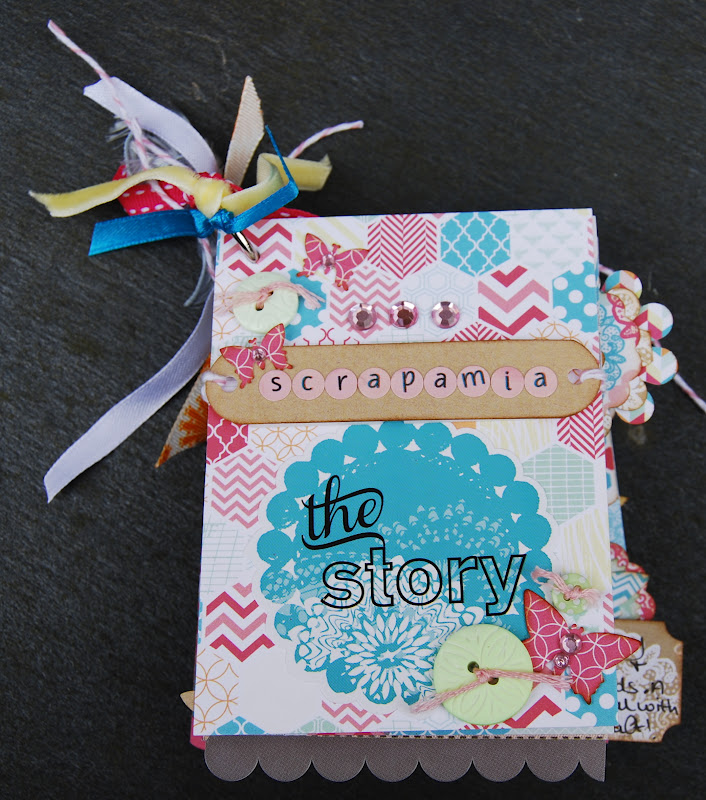
I used lots of punched shapes throughout the book and I also used up lots of odds and ends from my stash such as sticky ribbons and buttons.

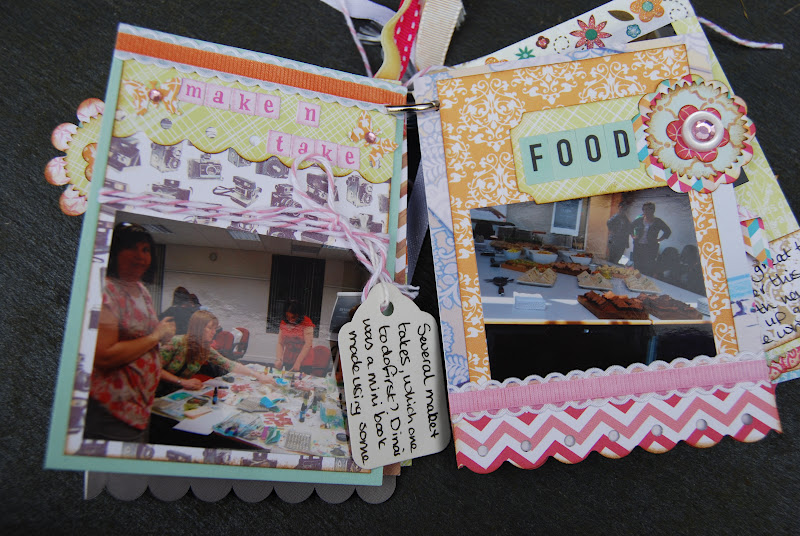
This minibook is about a scrapbooking retreat I went to last year and contains some of my favourite photos from the weekend.

This book is a lasting memory of some of the classes I attended and the projects I made!

I used up lots of odd gems, stickers and brads in the book too - mini books are great stash busters.
I used several different coloured mini-alphabets too similar to these.
These teeny letters are great to use with mini books and as subtitles or for long titles etc.

I like being able to hang bits off the edges of the pages and make it really eclectic. Try to mirror facing pages with matching off the page elements to keep continuity through your book.


I made a little pocket on the inside of the back page to hold the photos that I wasn't so keen on but still told part of the story.

The back page is made of strips of the different papers which looks great with the strips of different ribbons on the single book ring. Also a great way to use up all those scraps and off cuts!

Here are some close ups so you can really see how perfectly the smaller scale on the 6x6 pads works for these little projects. Lots of lovely layered circular embellishments again and some on trend pennants.

A layered rosette for some dimension which are so easy to make from 6 x 6 papers.

Punched borders work really well on mini books and again the smaller scale makes it easy on the eye.

Little windmills are another embellishment that work so well with 6 x 6 papers - the miniaturised patterns and double sided designs are just perfect.

Mini punched butterflies make the most of every single tiny scrap of the papers and work so well with the denser patterns.

Layering up different shaped embellishments really gives a sense of dimension without creating too much height in this kind of project. The other fab thing about the 6x6 papers is that you can run a sheet through your die-cutting machine without having to cut it down to fit - saving time and less waste!!

I hope you can see why I love the versatility of the 6x6 paper pads and I hope that you have enjoyed this little series and seen a few ideas for using your own pads.
If you have been inspired by anything you've seen in this post, the first part or in Part 2 then we'd love to come and see!
Want to win a prize????
Well, all you have to do is leave a comment on any of the "6 x 6 Celebration" posts with a link to your own 6 x 6 project and link up to the S J Crafts blog from your blog post and you'll be entered to win!
Our favourite project will be chosen to win a little prize!!
Your blog post must be dated on or after 24 August (ie the start of this series!)
Your blog post must be dated on or after 24 August (ie the start of this series!)
Closing date for entry is Sunday 16th September!! Good Luck!!
Lisa-Jane
x


